Beautiful Plants For Your Interior
Beautiful Plants For Your Interior

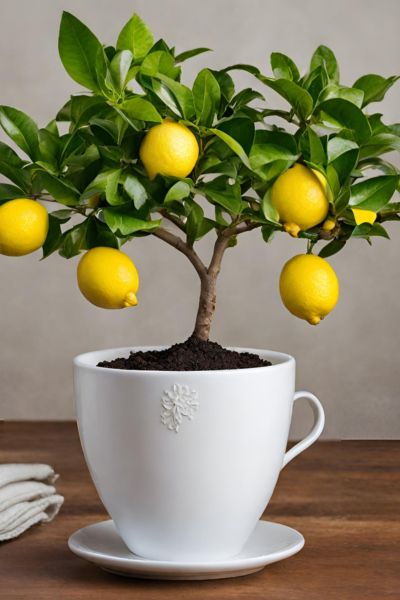
Are you a lemon lover looking to grow your own citrus tree indoors? Planting lemons in a cup is a fun and rewarding project that can bring a burst of sunshine into your home, even in the depths of winter.
Not only will you have access to fresh, homegrown lemons, but you’ll also enjoy the beauty of a miniature lemon tree that can thrive for years with proper care.
In this comprehensive guide, we’ll walk you through the entire process, from selecting the right lemon seed to nurturing your tiny tree to fruition.
Before we dive into the nitty-gritty, let’s explore the benefits of growing lemons in a cup:
Before you begin, gather the following supplies:
Start by selecting a fresh, ripe lemon. Gently twist the fruit to separate it into two halves, being careful not to damage the seeds inside. Remove a few seeds from the center and rinse them under cool water to remove any pulp or membrane.
Next, you’ll need to stratify the lemon seeds, which means exposing them to cold temperatures for a period of time. This process helps break down the seed’s internal hormones, encouraging germination. Here’s how to do it:
While your lemon seeds are stratifying, it’s time to prepare the container. Choose a small cup or pot with adequate drainage holes to prevent waterlogging, which can lead to root rot. A 4-6 inch wide and deep container is ideal for starting your lemon tree.
Fill the container with a well-draining potting soil mix, leaving about an inch of space from the rim. Gently tap the container to settle the soil and create a shallow indentation in the center for planting the seed.
After the two-week stratification period, your lemon seeds should be ready for planting. Carefully remove them from the paper towel and select the plumpest, healthiest-looking seed.
Using your fingertip or a pencil eraser, create a small hole in the center of the soil, about half an inch deep. Gently place the lemon seed in the hole and cover it with soil, pressing down lightly to ensure good seed-to-soil contact.
Mist the soil with water from a spray bottle, being careful not to oversaturate it. The soil should be consistently moist but not waterlogged.
Now comes the exciting part – watching your lemon seed sprout and grow! Here are some tips to ensure your seedling thrives:
Lemon trees require plenty of sunlight, ideally six to eight hours of direct sunlight per day. If you have a sunny, south-facing windowsill, place your container there. If not, consider investing in grow lights or a small greenhouse to provide the necessary light.
Lemons prefer warm temperatures between 65°F and 80°F (18°C to 27°C). Avoid placing your container near drafts, air conditioning vents, or heating sources, as extreme temperature fluctuations can stress the plant.
Keep the soil consistently moist but not waterlogged. Check the soil moisture level daily and water when the top inch of soil feels dry to the touch. Avoid letting the soil dry out completely, as this can stunt the plant’s growth or cause it to wilt.
Lemon trees thrive in humid environments. If the air in your home is particularly dry, consider placing the container on a tray filled with pebbles and water to increase humidity around the plant.
Once your lemon seedling has developed its first set of true leaves (not the initial seed leaves), you can begin fertilizing with a balanced, water-soluble fertilizer every two to four weeks during the growing season.
As your lemon tree grows, you’ll need to transplant it into a larger container and prune it to maintain its size and shape.
When your lemon tree outgrows its initial container, typically after six to twelve months, it’s time to transplant it into a larger pot with fresh potting soil. Choose a container only slightly larger than the current one, as lemon trees prefer to be slightly rootbound.
To keep your indoor lemon tree manageable and encourage bushier growth, prune it regularly. Remove any dead or damaged branches, as well as any vertical shoots that outgrow the desired height. Prune immediately after the tree has finished producing fruit, as pruning during the flowering or fruiting stages can reduce your harvest.
One of the most exciting aspects of growing a lemon tree indoors is the potential for homegrown fruit. However, successful pollination is crucial for fruit production.
Lemon trees are self-fertile, meaning they can pollinate themselves, but indoor environments often lack the necessary airflow and insect pollinators. To increase your chances of a bountiful harvest, you’ll need to manually pollinate your tree.
Here’s how to do it:
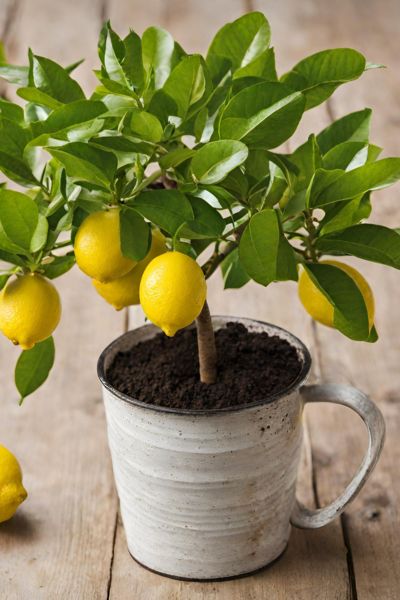
With proper pollination, your lemon tree should produce small, green fruits that will gradually turn yellow as they ripen. Be patient, as it can take several months for the fruits to fully mature and develop their signature tangy flavor.
When your lemons are fully ripe and have reached their characteristic yellow color, they’re ready to be harvested and enjoyed! Gently twist the fruit off the tree, being careful not to damage the branches or any remaining blooms.

Fresh, homegrown lemons can be used in a variety of culinary applications, from adding a burst of zesty flavor to beverages and desserts to enhancing savory dishes like seafood, salads, and marinades. You can also use the zest and juice in cleaning products or as a natural air freshener.
Congratulations! You’ve successfully grown a lemon tree in a cup, enjoying the process from seed to fruit. With proper care and attention, your miniature citrus tree can continue to produce fragrant blooms and tangy fruits for years to come.
Even with diligent care, you may encounter a few challenges when growing lemons in a cup. Here are some common issues and how to address them:
If your lemon tree’s leaves are turning yellow, it could be a sign of overwatering, nutrient deficiency, or exposure to extreme temperatures. Adjust your watering schedule, apply a balanced fertilizer, and ensure the plant is in a warm, sunny location.
Leaf or flower drop can be caused by environmental stress, such as sudden temperature changes, drafts, or low humidity. Try to maintain consistent conditions and increase humidity around the plant.
Indoor lemon trees can be susceptible to pests like spider mites, mealybugs, or scale insects. Regularly inspect your plant for signs of pests and treat infestations promptly with insecticidal soap or neem oil.
If your lemon tree is not producing fruit, it could be due to inadequate pollination, insufficient sunlight, or improper pruning. Follow the pollination instructions in Step 6, ensure the plant receives ample sunlight, and prune carefully to encourage fruit production.
With patience, dedication, and the right care, your lemon tree in a cup can overcome any challenges and continue to thrive, providing you with a refreshing taste of homegrown citrus for years to come.