Beautiful Plants For Your Interior
Beautiful Plants For Your Interior

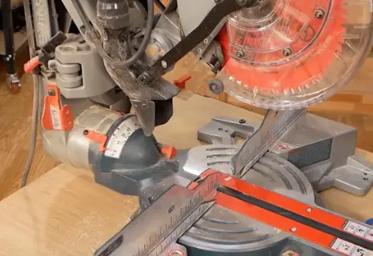
Cutting crown molding with a circular saw is easy. Follow these steps:
As a homeowner, I know how important it is to have a beautiful home. A great way to spruce up any room is to install crown molding. Crown molding adds a touch of elegance and sophistication to any space, and it’s also relatively easy to install. But, what’s the best way to cut crown molding? I recently decided to tackle the task myself and discovered that cutting crown molding with a circular saw is actually quite simple – once you know how to do it.
In this blog, I’ll share with you my personal experience cutting crown molding with a circular saw. I’ll walk you through everything you need to know, including what kind of saw to use, what tools you’ll need, how to mark the molding for an accurate cut, how to safely secure the molding while you’re cutting it, and what safety precautions you should take. I’ll also share my tips for making the most accurate and professional-looking cuts.
Crown molding is a decorative trim that’s used to finish off the tops of walls and ceilings. It adds a classic, elegant touch to any room and makes a huge statement. Plus, it’s relatively easy to install!
If you’re looking to do a quick home improvement project, adding crown molding is a great option. It’s an inexpensive way to make a big impact on a room without breaking the bank. Plus, it adds an extra layer of insulation to your walls, which helps with both soundproofing and energy efficiency.
But the best part of all is the fact that you can cut crown molding with a circular saw — no fancy tools required! With this simple guide, you can get it done in no time and have beautiful crown molding that makes your home look like a million bucks.
When it comes to cutting crown molding, there’s no better saw to use than a circular saw. This versatile tool is ideal because it offers superior control and accuracy, allowing you to make angled and straight cuts with ease. It also has the power to make quick work of even the toughest materials. Plus, it’s surprisingly affordable, so it won’t break the bank. So if you’re looking for the perfect saw to cut crown molding, then a circular saw is your best bet.
When cutting crown molding with a circular saw, you’ll need a few additional tools. These are essential for helping you achieve a professional-looking finish.
First, you’ll need a miter box to ensure that your cuts are straight and accurate. A miter box enables you to make precise, 90-degree cuts in your crown molding. You’ll also need a coping saw or jigsaw to make the intricate, curved cuts.
You’ll also need a power drill with a screw-tip attachment. This will help you secure your crown molding in place. Finally, you’ll need a nail gun to help you secure the crown molding more securely.
So, when cutting crown molding with a circular saw, don’t forget to pick up these essential tools. With the right tools, you’ll be able to easily and accurately cut crown molding for a polished, professional look.
Cutting crown molding with a circular saw can be intimidating, but it’s actually quite straightforward once you get the hang of it. One of the most important steps is getting the right measurements and marking the molding accordingly. The best way to mark the molding for an accurate cut is to use a story stick.
A story stick is simply a board that you can measure and mark with the dimensions of the cut you need to make. It’s an indispensable tool when it comes to cutting crown molding accurately. To use it, measure the length and angle of the cut you need to make and then mark the story stick with those measurements. Then, place the story stick against the molding and use a pencil to trace the line you need to cut.
Using a story stick is a quick and easy way to mark the molding for an accurate cut. It ensures that every cut you make is precise and consistent, which is essential when working with crown molding. Once you have the measurements marked on the story stick, all you need to do is set your circular saw to the right depth and make the cut.
Securing your molding while you’re cutting it is essential. Fortunately, there are some easy steps you can take to make sure it won’t move while you’re working.
First, you’ll need to create a jig to hold the molding in place. To do this, you’ll need to attach a long straight board to your saw’s platform. The board should be a few inches longer than the length of the molding that you’re cutting. Then, you’ll need to attach clamps to the board to help hold the molding in place.
Another way to secure the molding is to use a pair of clamps. You’ll need to attach one clamp to the end of the molding and the other clamp to the platform of the saw. This will help hold the molding in place while you’re cutting it.
Finally, you’ll want to make sure that the saw is firmly secured to the platform. This will help reduce any vibrations, which can cause your molding to move while you’re cutting it.
By following these steps, you can safely secure your molding while you’re cutting it.
When cutting crown molding with a circular saw, safety should always be your top priority. Here are some simple tips that you can follow to stay safe while tackling this project.
First, make sure to wear the proper safety gear. Eye protection, gloves, and a dust mask are a must. This will help to protect you from sawdust, splinters, and flying debris.
Next, be sure to check your saw blades before using them. Make sure that they are in good condition, and that the teeth are sharp for a clean cut.
Finally, when you’re actually using the saw, be sure to keep your hands away from the blade. Never put your hand in front of the saw blade, and make sure that the blade is always spinning in the direction of the cut. Keep your hands firmly on the handle of the saw, and be aware of your surroundings.
By taking the proper precautions and following these simple tips, you can safely cut crown molding with a circular saw.
Making the actual cut with a circular saw is surprisingly easy. You start by setting up your saw and making sure it’s in the right position for the cut you want to make. Next, you’ll measure the length of the cut and mark the crown molding. Once you’ve marked the cut, you’ll want to get the saw guide in place, which is simply a straightedge that will help keep the saw in a straight line. Then, you’re ready to turn on the saw and make the cut. To get a clean cut, you’ll want to keep the saw guide tight to the piece of molding as you make the cut. When you’ve finished the cut, you can turn off the saw and check your work.
When cutting crown molding with a circular saw, accuracy and a professional finish are key. Here are some tips to get the best results:
Start by accurately measuring and marking the line of your cut. If you’re using a makeshift jig, make sure it’s level and secure. If you’re freehanding the cut, take your time and make sure you’re following the line.
To get a clean and accurate cut, use a high-quality carbide-tipped blade. This type of blade is designed to help you make smooth and precise cuts in wood.
When you’re ready to cut, use a slow and steady motion. If your circular saw has a speed setting, turn it down so the blade is spinning at a slower rate. This will help you make a cleaner, more professional-looking cut.
Finally, make sure you’re wearing safety equipment, such as goggles and a dust mask, to protect yourself from debris and dust. Taking the time to follow these tips will help you achieve an accurate and professional-looking cut when cutting crown molding with a circular saw.
To get accurate and professional-looking cuts when cutting crown molding with a circular saw, you need to use a special jig to help guide the saw. It’s important to measure, mark, and cut each piece with precision. Additionally, the saw blade should be positioned at the correct angle for the type of molding you’re cutting. With practice, you should be able to make consistent and clean cuts with your circular saw.
When cutting crown molding with a circular saw, it is important to take certain safety precautions. These include wearing safety glasses, using a clamp to secure the molding, keeping your hands away from the saw blade, and unplugging the saw when not in use. Additionally, double-check that the saw blade is sharp and in good condition before beginning the project. Following these safety precautions will help ensure a safe and successful cutting experience.
To get the most precise cut when cutting crown molding with a circular saw, be sure to adjust the speed of the blade, make sure the blade is sharp and free of debris, use a sharp carpenter’s pencil, mark all of your measurements precisely, and use a laser guide to ensure a straight cut.