Beautiful Plants For Your Interior
Beautiful Plants For Your Interior

Have you ever struggled with cutting precise curves and circles on your woodworking projects? If you have, you’re not alone. Circular shapes can be difficult to achieve with standard tools, but with the right techniques and equipment, you can cut them accurately and efficiently. In this article, we’ll show you how to do just that using a table saw.
We’ll start by preparing the table saw for curved cuts and setting up jigs for cutting different circular shapes. You’ll also discover how to select the right blades for your cuts and how to troubleshoot common problems that may arise. Finding it tough to cut large circles? Don’t worry, we’ve got you covered with techniques that will make it easier.
Safety is always a top priority when using a table saw, and we’ll provide you with tips to cut curves and circles with a high level of safety. Lastly, we’ll share best practices for maintaining your table saw for optimal performance. By the end of this article, you’ll be ready to take on any curved or circular woodworking project with confidence.
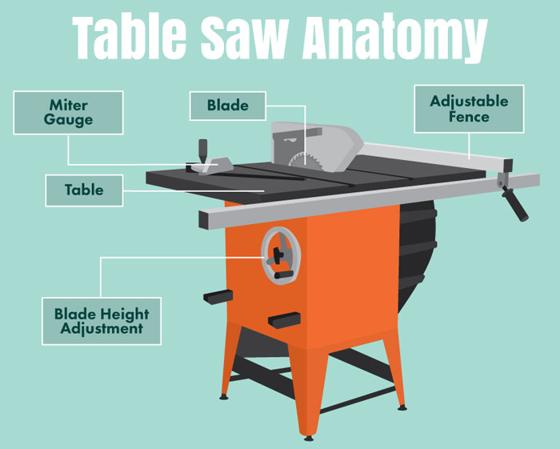
Before you start working on your table saw for cutting the curved or circular shapes, you need to prepare your saw. This step is very important for both your saw’s accuracy and your safety. Here are some essential steps to prepare your table saw for curved cuts:
Preparing your table saw for curved cuts will help to ensure that you achieve the best results safely and accurately.
One of the best ways to ensure accurate and uniform cuts when creating circular shapes is to use a jig. A jig is a specialized fixture that holds your work in place and helps guide it through the saw blade to yield consistent results.
To begin, determine the size of the circle you want to make, and then create a jig. You can construct a simple jig using plywood or MDF, cutting a hole in it the same size as your desired circle. Then, attach your workpiece to the jig using clamps or screws, and use the edge of the jig as a guide to cut the circle with your table saw.
For irregularly shaped circles or curves, you can create a custom jig using a pattern. Trace the shape of your curve onto plywood or MDF, and then cut it out. Use this template to guide your cuts and ensure that each piece is identical.
By using jigs to assist in creating different circular shapes, you can achieve precise and consistent results that are difficult to achieve manually. When combined with proper blade and saw setup, this technique can help take your woodworking to the next level.
One of the most crucial elements in making smooth and accurate curved cuts with a table saw is selecting the right blade for the job. When choosing a blade specifically for curved cuts and circles, it’s essential to keep in mind the blade’s width, thickness, and teeth.
It’s important to use a narrow blade that is flexible enough to bend and follow the cut’s curvature. The thinner the blade, the tighter radius it can cut smoothly. On the other hand, a thicker blade is perfect for shallow curves and straight cuts.
Blades with a high tooth count, such as 80-100 teeth, are excellent for making precise cuts with a smooth edge, while blades with fewer teeth, like 24-40 teeth, are better suited for cutting thicker and rougher materials.
When cutting materials like plastics or laminates, use carbide-tipped blades, which are more durable and last longer than regular steel blades. And always ensure that the blade’s size is compatible with your table saw to avoid accidents and ensure the best performance.
Using the right blade for curved cuts and circles is a vital step in achieving optimal results with your table saw. By following these simple tips, you’ll be able to create precise and beautiful curves and circles effortlessly.
Cutting curves and circles with a table saw can be a challenging task, especially for those who are not familiar with the process. However, there are a few tips that can help you make smooth and accurate curved cuts with a table saw.
Firstly, it is important to have a clear understanding of the blade’s position and the direction of the cut. You may need to make a test cut on a scrap piece of wood to ensure that the blade is aligned properly, and that the cut will be straight and accurate.
Secondly, it’s recommended to use a saw blade with a high tooth count that is specifically designed for cutting curves and circles. The high tooth count allows for a smoother cut, and also helps to prevent the blade from binding.
Thirdly, it’s crucial to use a feather board to help guide the wood through the saw blade. This will help to ensure that the wood stays in place and does not move during the cut, which can cause inaccuracies.
Lastly, take your time and be patient. Sawing curves and circles requires precision and accuracy, so don’t rush the process. With practice and experience, you will be able to create smooth and accurate curved cuts with a table saw.
Remember, safety must always come first. So make sure to follow all safety precautions while performing the task.
Cutting large circles on a table saw requires a different approach than cutting smaller circles. To achieve precise and smooth cuts, you need to use the right tools and techniques. Here are some tips for cutting large circles with a table saw:
By using a sled or circle-cutting jig and following these techniques, you can accurately and safely cut large circles with a table saw.
Cutting curves and circles with a table saw can be a potentially dangerous activity. However, with the right techniques in place, you can minimize the risk and ensure that your woodworking projects turn out to be smooth, accurate, and most importantly, safe.
Here are some tips for cutting curves and circles with a high level of safety:
By following these safety tips and techniques, you can easily cut curves and circles with a high level of safety on a table saw.
Even the most experienced woodworkers sometimes encounter issues when cutting curves and circles with a table saw. But don’t worry – the following troubleshooting tips can help you to overcome some of the most common problems:
By troubleshooting these common issues, you can ensure that your curves and circles are smooth and accurate every time.
Maintaining your table saw in pristine condition can help you achieve consistent and accurate results when cutting curves and circles. Here are some best practices for keeping your table saw in top shape:
By following these maintenance tips, you can help ensure optimal performance and longevity of your table saw for years to come.
In conclusion, cutting curves and circles on a table saw may seem daunting at first, but with the right techniques and tools, it’s a skill that anyone can master. By following the steps outlined in this guide, you can prepare your table saw for curved cuts, set up jigs for cutting different circular shapes, select the right blades, and troubleshoot any issues that arise. You’ll also find tips for making smooth and accurate curved cuts, cutting large circles, and doing so safely.
Remember, when it comes to using a table saw for curved cuts and circles, the most important thing is to take your time and work carefully. Always wear the proper safety gear, use the right blade and jig for the job, and maintain your table saw for optimal performance. With practice and perseverance, you’ll be creating beautiful curves and circles in no time. Happy sawing!