Beautiful Plants For Your Interior
Beautiful Plants For Your Interior

Do you have trouble making the perfect bevel cuts for your woodworking projects? Don’t worry, with the right tools and techniques, you can achieve precise and professional-looking beveled edges every time. In this blog post, we’ll discuss everything you need to know about using a table saw for bevel cuts, including safety precautions, understanding different types of bevel cuts, setting up the table saw, selecting the right blade, adjusting the blade angle, techniques for making different cuts, maintaining and cleaning the table saw, troubleshooting common issues, enhancing precision with additional tools, and tips and tricks for achieving high-quality bevel cuts. Whether you’re a beginner or an experienced woodworker, this post will provide you with valuable insights and practical advice for using a table saw to achieve perfect bevel cuts for your projects. So, let’s dive in and take your woodworking skills to the next level!
Before you start to make any kind of cuts with a table saw, it’s extremely important to follow certain safety precautions to avoid any potential accidents. Here are some of the steps you need to take before using a table saw:
By following these safety measures, you can minimize the risk of accidents and feel confident while working on your project.
Before making any bevel cuts on a table saw, it’s essential to have a good understanding of the different types of bevel cuts that can be made.
A bevel cut is a cut made at an angle across the edge of a workpiece, rather than straight through it. Some of the most common types of bevel cuts include:
It’s important to note that the type of bevel cut you need to make will depend on the project you’re working on. Each type of bevel cut requires a different setup and technique, so make sure to plan accordingly.
In the next section, we’ll discuss how to properly set up your table saw for bevel cuts.
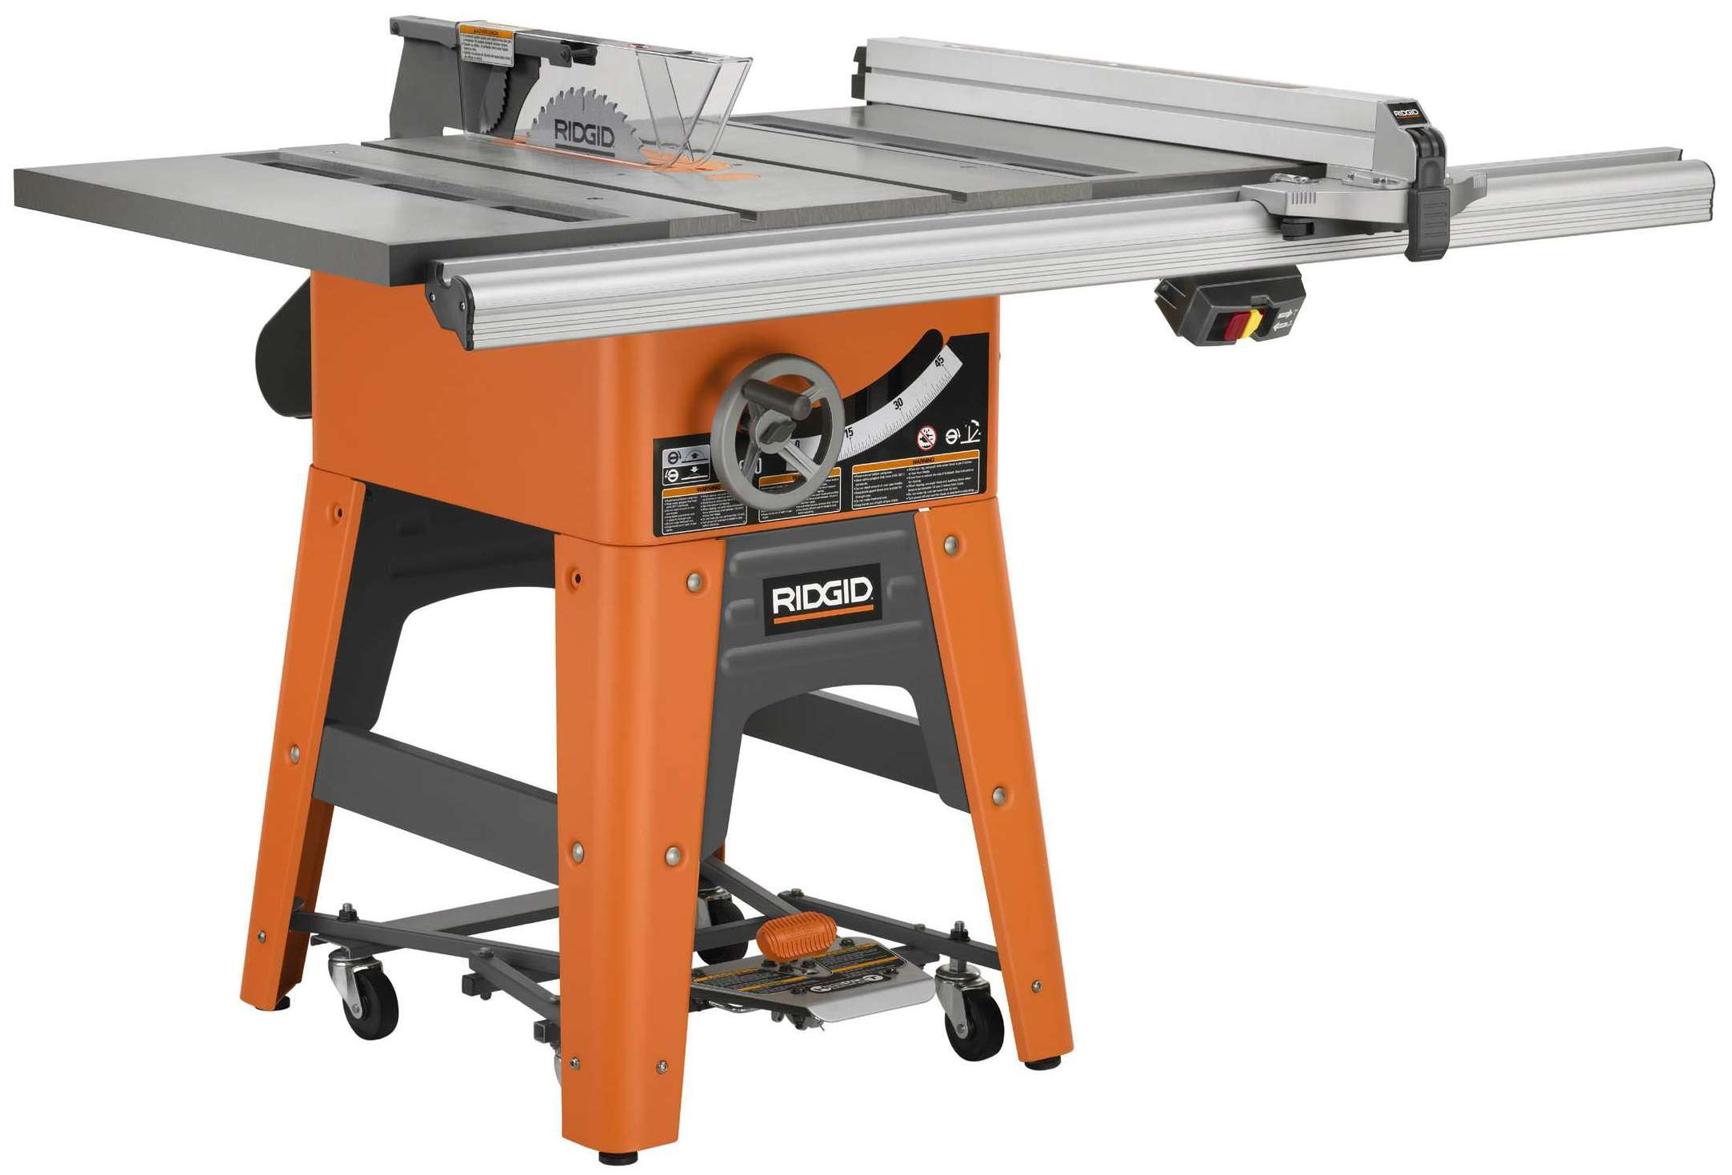
Before diving into making bevel cuts, it is essential to ensure that your table saw is set up correctly. Follow these steps to set up your table saw for bevel cuts:
By following these steps, you can set up your table saw for bevel cuts and achieve the desired angle and precision. Remember to always prioritize safety by wearing appropriate safety gear, keeping your fingers away from the blade, and turning off the power supply when adjusting the blade angle.
Selecting the right blade for bevel cuts is crucial for achieving precise bevels every time. There are two main types of saw blades that you can use for bevel cuts: crosscut blades and rip blades. Crosscut blades are designed to cut across the grain of the wood, while rip blades are designed to cut with the grain of the wood. It is best to use a rip blade when making bevel cuts, as it will produce cleaner cuts with less tearout.
It is also important to consider the tooth count of the blade. Blades with a high tooth count are best for making fine bevel cuts in materials with a thin profile, while blades with a lower tooth count are better for making rougher cuts in thicker materials.
When selecting a blade for bevel cuts, make sure to check the manufacturer’s recommendations for the blade’s maximum bevel angle. Using a blade beyond its recommended bevel angle can result in dangerous kickback and can damage the blade.
Overall, selecting the right blade for bevel cuts is an essential step to achieve precision and accuracy in your woodworking projects.
The blade angle is a crucial factor that determines the perfect bevel cut. If the blade angle is not set accurately, it can significantly affect the quality and precision of the bevel cut. Therefore, it’s essential to adjust the blade angle correctly for achieving perfect bevel cuts every time.
To adjust the blade angle, you need to loosen the bevel lock lever and tilt the blade housing to the preferred angle. Usually, the tabletop has markings that help with precise angle adjustment, but it’s always wise to use a protractor or an angle meter to ensure the blade angle is accurate.
It’s important to maintain consistency in the blade angle throughout the cutting process, especially if you’re making multiple bevel cuts. Even a slight deviation in the blade angle can lead to uneven bevels, making it difficult to achieve the desired outcome.
In conclusion, perfect bevel cuts depend significantly on the blade angle, and adjusting it correctly is crucial for achieving high-quality bevel cuts every time. Remember to maintain consistency in the blade angle throughout the cutting process to ensure uniform bevels.
Bevel cuts are popular in woodworking because it adds extra dimensions and a modern look to the projects. There are different types of bevel cuts that you can make using a table saw. Here are some of the most common techniques:
Straight bevel cuts are the simplest type of bevel cuts. It involves tilting the blade to the desired angle and then making a straight cut. To create a straight bevel cut, position the wood at the correct angle on the table saw and slowly move it through the blade.
Compound bevel cuts are a bit more complicated. It involves using both the miter gauge and the blade angle to make a bevel cut in two directions. This type of cut is common when you need to create crown moulding for your project. Compound bevel cuts require accurate calculations and measurements to avoid making mistakes.
Chamfer bevel cuts are angled cuts made to the edges of a piece of wood. It involves setting the blade at a specific angle and making the cut along the edge of the wood. This type of cut is commonly used in creating decorative designs on wooden furniture or making wooden handrails.
Remember to always maintain proper safety precautions and to select the right blade for your bevel cuts. With these techniques, making different bevel cuts will become easier and more exciting.
After you finish your woodworking projects, your table saw is likely to have sawdust, wood chips, and other debris on its surface. This can negatively affect its performance and lifespan if not taken care of properly. As a woodworker, it’s essential to maintain and clean your table saw regularly.
Start by turning off the saw and unplugging it. Next, remove all the accessories, including the blade, the blade guard, and the miter gauge. Use an air compressor or a brush to remove dust and debris from the saw’s body, blade, and accessories.
Check the saw’s blade and accessories for any damage or wear and tear. If you notice any issues, replace them immediately.
After cleaning, apply a light coat of lubricating oil on the blade, trunnions, and other metal components to prevent rusting. Finally, reassemble all the accessories, and your table saw is ready for your next project.
Maintaining and cleaning your table saw regularly not only increases its lifespan, but it also ensures your safety while using it. So, make sure to include this essential maintenance practice in your woodworking routine.
Even the most seasoned woodworkers encounter problems while making bevel cuts on a table saw. These issues can result from a range of causes, and it is essential to know how to deal with them. Here are some of the most common problems that may occur while making bevel cuts and how to address them:
Remember to always wear protective gear and follow safety procedures while troubleshooting issues with your table saw. With practice and experience, you will be able to quickly identify and resolve problems while making bevel cuts.
If you’re looking to take your bevel cuts to the next level, consider adding some additional tools to your arsenal. These tools can help you achieve the precision and accuracy needed for high-quality bevel cuts. Here are some tools you can use:
By using these additional tools, you can take your bevel cuts to the next level and achieve precision and accuracy that would be difficult to achieve otherwise. Incorporating these tools can make a significant difference in the outcome of your bevel cuts.
Achieving high-quality bevel cuts requires precision and attention to detail. Here are some tips and tricks to help you achieve perfect bevel cuts every time:
By following these tips and tricks, you’ll be able to achieve high-quality bevel cuts every time, no matter what type of bevel cut you’re making.
In conclusion, using a table saw for perfect bevel cuts every time requires a clear understanding of the safety precautions that must be followed before operating the saw. Once you have the proper safety measures in place, it all begins with understanding the different types of bevel cuts possible with a table saw. Then, setting up the saw and selecting the right blade for bevel cuts is important for precision. Adjusting the blade angle will give you the perfect bevel cuts. Once you have these basics covered, you can start using different techniques for making different bevel cuts.
The secret to perfect bevel cuts lies in the details. You will have to maintain and clean the table saw properly, troubleshoot common issues, and use additional tools to enhance your precision. With practice, you can achieve high-quality bevel cuts every time. Remember, safety first! Always follow safety precautions while using the table saw, and keep these tips and tricks in mind for perfect bevel cuts every time.