Beautiful Plants For Your Interior
Beautiful Plants For Your Interior

Welcome to my blog, where today we’ll be diving into the world of woodworking and learning how to cut dados on a table saw. If you’re an avid DIYer or a seasoned woodworker, you know that dados are an essential component of any joinery project. They are essentially square grooves that are cut in a piece of wood to fit another piece of wood snugly, and they make up the framework of many furniture pieces.
In this blog post, I’ll be walking you through the step-by-step process of cutting dados with a table saw. I’ll cover everything from choosing the right dado blade to safety precautions and tips to ensure you have a satisfying and safe woodworking experience.
If you’re eager to learn the art of dados, then make sure you read on. By the end of this post, you’ll have a good understanding of how to create these important grooves and take your woodworking skills to the next level.
So, let’s get started!
When it comes to cutting dados on a table saw, choosing the right dado blade is essential. The right blade will save you time, effort, and money in the long run.
Dado blades come in various sizes: 6-inch, 8-inch, and 10-inch. You also have to consider the number of teeth on the blade. Typically, the more teeth, the smoother the cut. However, a blade with fewer teeth can cut faster.
It’s also important to consider the blade’s width capacity. This will determine the thickness of the dado that you can cut.
When choosing a dado blade, it’s crucial to ensure that it’s compatible with your table saw. Some dado blades are designed for a specific saw. Make sure that you check the manufacturer’s specifications before buying a dado blade.
Remember, choosing the right dado blade is a critical step in achieving a successful cut. So, take your time and do the research to find the blade that will best suit your needs.
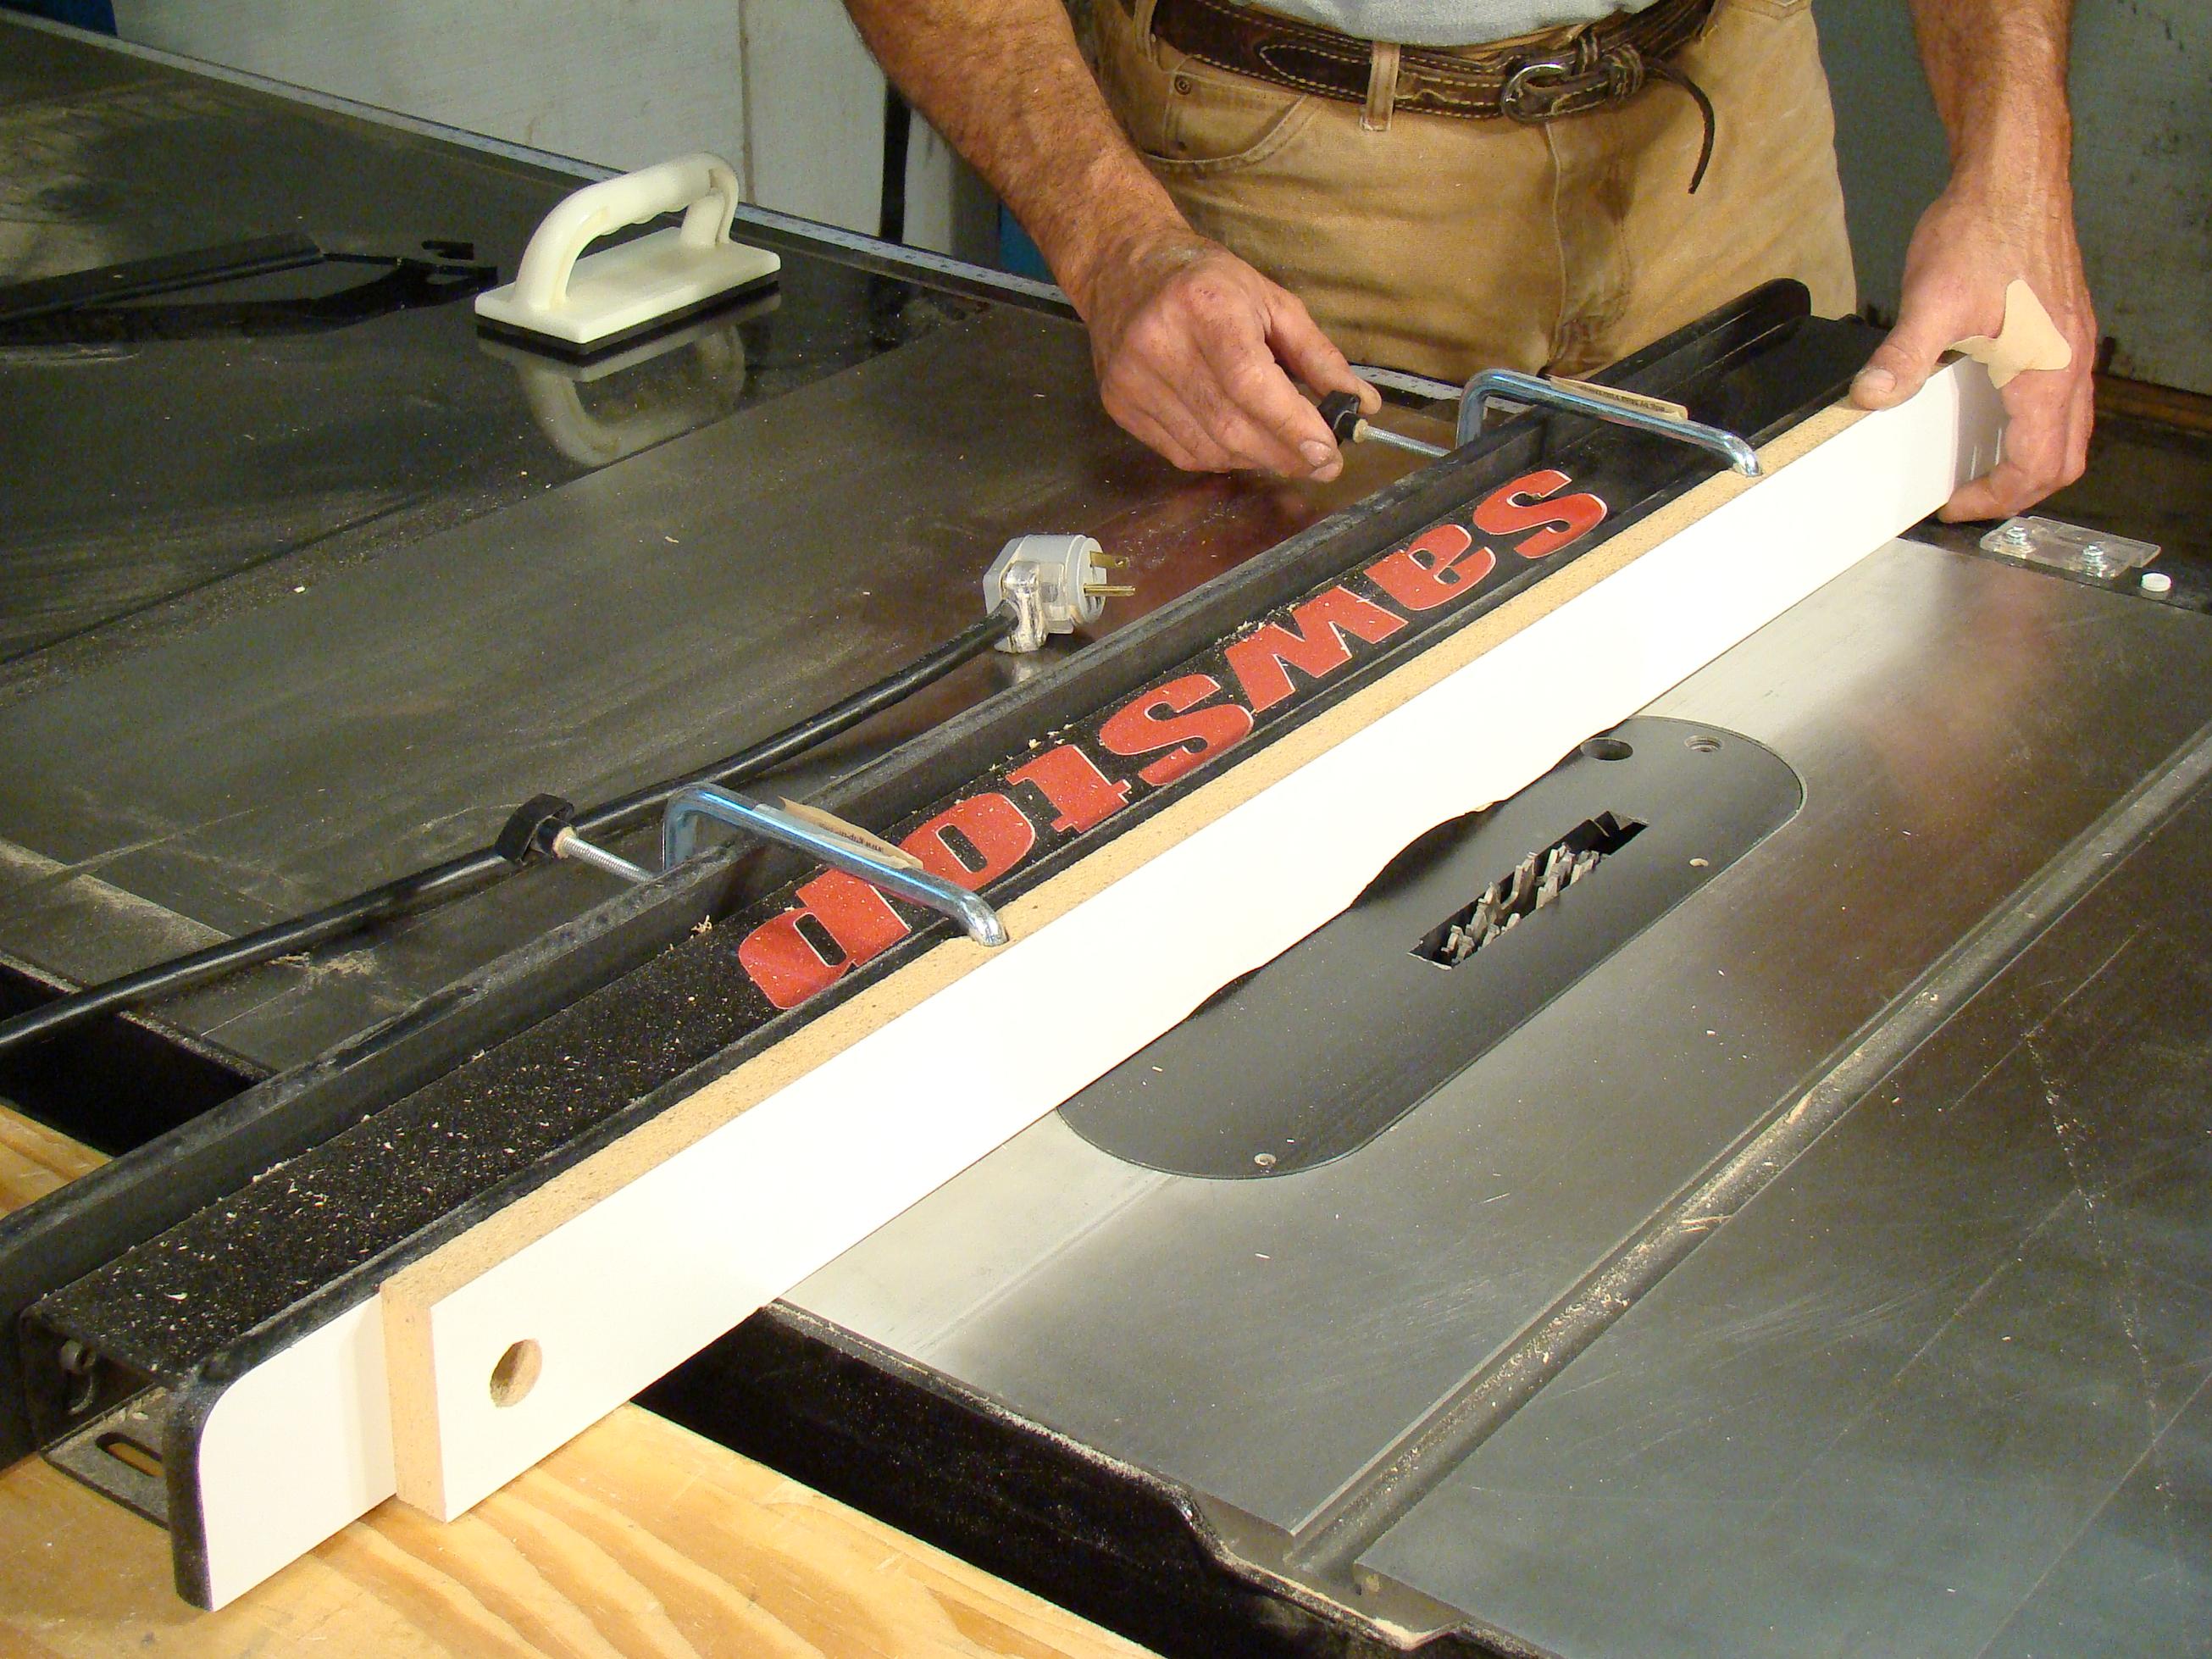
Before cutting dados on your table saw, the first step is to ensure that your saw is set up properly. Here are the steps to set up your table saw:
By setting up your table saw correctly, you can minimize the risk of accidents and create accurate dados.
The key to a perfect dado cut lies in how you mark your wood prior to cutting it. Marking accurately and in the right places will help you achieve the desired results. Firstly, measure the width of the dado and mark it on the wood where you want to make the cut. Take note of the depth of the blade and mark the wood with a line representing the depth of the blade. Also, make sure to mark the starting and stopping point of the cut. Using a square can help you ensure that your markings are straight and accurate.
Once you have marked the wood, double-check your markings for accuracy. This is important because any deviations from the markings can affect the final results significantly. It’s also a good idea to take a moment to consider the grain direction while marking the wood. The dado should be cut across the grain, so mark the wood accordingly.
By taking the time to mark your wood accurately, you’ll ensure that your cuts are precise and that the final product looks clean and professional. With this done, you’re now ready to move on to the next stage of preparing for the dado cut.
To achieve a perfect dado cut, you need to adjust the blade height so that it cuts precisely to the width and depth you require. To do this, first, ensure that the saw is turned off and unplugged. Then, begin adjusting the blade height by using the blade height adjustment wheel or crank on your saw until it reaches the desired height.
Don’t forget that the blade height will influence the width of the dado as well. So, be sure to measure and make any necessary adjustments before you start making cuts. If you make the cut and later realize it’s too wide or too shallow, you’ll have to start all over again.
It’s essential to take your time and make small adjustments, double-check with your measuring tool, and repeat the adjustment process until you achieve perfection.
Once you’ve adjusted the blade height to your desired depth and width, you’re ready to start cutting the dado. Be sure to follow the other steps in this guide to get the perfect dado cut!
Now that your dado blade is set up, it’s time to begin cutting. The first pass is crucial as it sets the foundation for the rest of your cuts. Start by turning on the saw and line up your wood with the blade, making sure to keep it flush against the fence. Remember to always keep your hands a safe distance away from the blade.
As you push the wood through, make sure to keep a steady pace and apply firm pressure. If you’re using a stacked dado blade, start with the outer blades and work your way inwards. Once you’ve completed the first pass, check to make sure the width of the cut matches your blade size.
Remember not to rush this step, as a misaligned or uneven first pass can lead to further complications down the line. Take your time and make sure you’re happy with the initial cut before moving onto subsequent passes.
In the next section, we’ll go over how to make those subsequent passes for a perfectly sized and smooth dado.
After making the first pass, you’ll need to assess whether you need to make more passes to achieve the desired dado width. If so, don’t try to make the cut in one go. Instead, make multiple passes, taking off a little bit of material with each pass.
When making subsequent passes, start by adjusting the blade height. Raise it slightly and make another pass. Lower it a bit and make another pass, and continue until you achieve the desired depth.
You should also adjust the fence so that it’s closer to the blade. This will remove less material in each pass, making it easier for the blade to make a clean cut, reducing tear-out and splintering.
Remember to be patient when making subsequent passes, making small adjustments after each pass. Rushing through it can lead to errors and accidents. And, always wear protective gear, like goggles and earplugs, to ensure your safety.
After completing all the passes to cut the dado, you will still have a few ridges or rough edges and debris left in the groove. To ensure accuracy and neatness, it is crucial to clean up the dado.
Firstly, use a chisel or a trim saw to remove any chunks or fibers sticking out of the dado. This step will also remove any debris that might have fallen in the groove.
Next, use a hand plane to smooth out any ridges left behind by the saw blade. Be sure to move the plane along the grain direction of the wood. You can also use abrasive paper to sand any uneven patches of the groove.
Make sure that all the remaining sawdust is cleaned up from the dado. A vacuum cleaner or compressed air is ideal for this task. Always ensure that the dado is clear before proceeding to the next step of the project to maintain accuracy.
By cleaning up the dado, you will achieve a clean and precise cut, creating a professional look to your finished work.
While cutting dados on a table saw, safety should always be the top priority. Here are some safety precautions and tips to follow:
By following these safety precautions and tips, you can safely and effectively cut dados on a table saw.
So there you have it, folks! Cutting dados on a table saw is a precise task that requires the proper tools, technique, and most importantly, precautions. Remember to choose the right dado blade for the job and set up your table saw accordingly. Marking your wood accurately and adjusting the blade height is essential to achieving a neat and clean cut. Making the first pass may be nerve-wracking, but with each subsequent pass, you’ll see your dado taking shape. Once you’re finished, a little cleanup will go a long way in ensuring a professional-looking finish. But always keep safety in mind, from wearing protective gear to using a riving knife and a featherboard to prevent kickback. Practice these tips and techniques, and you’ll be creating dado joints like a pro in no time!