Beautiful Plants For Your Interior
Beautiful Plants For Your Interior

Greetings, fellow DIY enthusiasts! There’s nothing quite like the satisfaction that comes with building your own furniture piece. Today, we’re going to dive into how to build a bookcase using your trusty table saw. If you’re a beginner, don’t worry – we’ll guide you through the process step by step.
First things first: let’s talk materials. We’ll give you a rundown of everything you’ll need and where to find them. We’ll also discuss different types of wood and which one might work best for your bookcase. Once you’ve gathered your materials, we’ll move on to measuring and cutting the pieces with your table saw.
Next, we’ll go over how to create the bookcase’s sections and then assemble the pieces. Don’t worry if it sounds complicated; we’ll break it down for you. After assembling, we’ll show you how to sand and prepare the bookcase for its finish. We’ll go over different types of finishes and how to apply them.
Last but not least, we’ll discuss how to dress up your bookcase and give you a few ideas to customize it to your liking. Lastly, we’ll cover maintenance and care so your bookcase will last for years to come. By the end, you’ll have a gorgeous bookcase to show off to all of your friends and family. Let’s get started!
Before you begin building your bookcase, gather all the necessary materials to ensure a smooth and hassle-free construction process. You’ll need your table saw (of course), as well as a few other items:
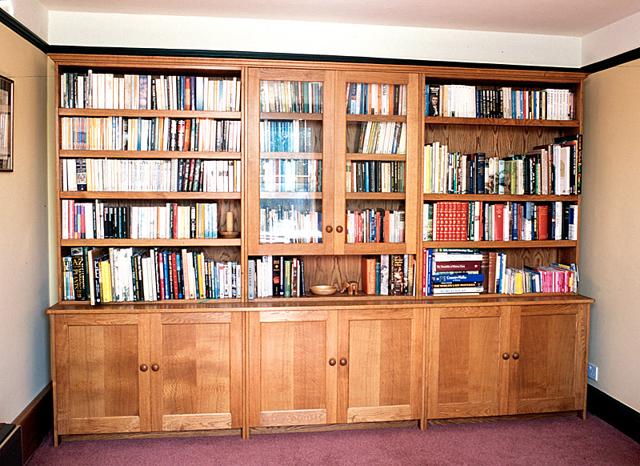
Choosing the right type of wood is crucial when building a bookcase. The most commonly used woods for bookcases are oak, cherry, and pine. Each type of wood has its own unique characteristics that will affect the appearance and durability of the finished bookcase.
Oak is a popular choice due to its strength and hardness. It also has a distinct grain pattern that adds character to the bookcase. Cherry, on the other hand, has a warm reddish-brown color that deepens over time. Its fine grain makes it ideal for carving intricate designs. Pine is a softer, more affordable option that is easy to work with. It is commonly used for rustic or country-style bookcases.
Before deciding on a type of wood, consider the style and purpose of the bookcase. A sturdy oak bookcase would be suitable for heavy books, while a pine bookcase would be better suited for decorative items or lighter reading material.
Also, keep in mind the overall aesthetic of your home. Your bookcase should complement the existing decor rather than clash with it. Take into consideration the color and finish of the wood and how it will look in the room where it will be placed.
Choosing the right wood is the foundation of a well-built bookcase. It’s important to take the time to select the best type of wood for your project to ensure a beautiful and functional finished product.
Before you start cutting, make sure all your measuring tools are accurate and in good condition. This includes your tape measure, straightedge, and square. It’s also a good idea to double-check your measurements before cutting anything.
When cutting your wood pieces, always wear protective gear such as safety glasses and a dust mask. Set the table saw to the correct height, and use the fence to guide the wood through the blade. Be sure to use a push stick to keep your hands safely away from the blade.
When cutting multiple pieces of the same length, it’s a good idea to use a stop block to ensure consistent cuts. This will save you time and ensure a more professional-looking finished product.
Remember to label your pieces as you go, using numbers or letters to indicate which section of the bookcase they belong to. This will save you time and confusion when it comes to assembling everything later on.
With your wood cut down to size, it’s time to turn those pieces into the individual sections of your bookcase. This is where you’ll need to pay close attention to the plans you’ve laid out and the measurements you’ve taken. The last thing you want is for one section to be off and throw off the entire build.
Start by laying out the pieces for each section on your work table, making sure they are in the correct order as per your plans. Once you’re satisfied with the placement, use a brad nailer or clamps to hold the pieces together while you glue and screw each one into place.
Repeat this process for each section of your bookcase, taking care to ensure they’re all uniform in size and shape. With each section built, you’ll now have the foundation for the final assembly.
As you proceed to the next step, make sure you refer to your plans and measurements closely to ensure that all sections come together as a cohesive unit.
Now that you have completed cutting each section of the bookcase, it’s time to assemble them. The first step is to lay out all the pieces and make sure that you have everything you need. Then, begin fitting the pieces together according to the design plan. Keep in mind that the assembled bookcase may be quite heavy, so it’s best to have someone to help with holding the pieces in place during the process.
Next, apply a layer of wood glue to the joint area and clamp the pieces together, as specified in the design plan. If you don’t have any clamps, you can use screws to hold the pieces in place instead. Be sure to pre-drill the screw holes to avoid splitting the wood. Leave the glued pieces aside for some time to let the glue dry and fuse the joints together.
Once the glued pieces have dried, remove the clamps or screws and gently sand the seams to smoothen any rough spots or edges. Then, repeat the same process of gluing and clamping the remaining sections together to complete assembling your bookcase. After the bookcase has been completely assembled and dried, apply a final coat of sanding to create an even smoother surface before moving on to the next step of sanding and preparing for the finishing.
Now that all the pieces of your bookcase are assembled, it’s time to sand and prepare them for a beautiful finish. Sanding helps smooth out any rough edges, removes small scratches, and prepares the wood for staining or painting. Here are a few tips to make sanding an easy and efficient process:
Preparing your bookcase for a finish is also an important step. If you are staining the wood, make sure to apply a pre-stain conditioner to prevent any blotchiness or uneven coloring. If you are painting your bookcase, make sure to fill any gaps or holes with wood filler and let it dry before applying the paint.
In the next section, we’ll discuss how to apply the finish to your bookcase to give it a polished look.
After you’ve sanded down your bookcase, it’s time to apply the finish. Applying a finish to your bookcase will not only protect the wood from damage but will also make it look beautiful. Before you start, make sure you have all the necessary materials such as a paintbrush, sandpaper, a clean cloth, and the finish of your choice.
When choosing a finish, it’s important to consider the type of wood you’re using, as some finishes work better on certain types of wood than others. For example, oil-based finishes are ideal for woods like walnut and mahogany, while water-based finishes work better on lighter-colored woods like maple and oak.
Before applying the finish, make sure to sand out any rough spots, ensuring a smooth surface. Once the sanding is complete, take a clean cloth and remove any loose debris, making sure the surface is clean and ready for application.
Start applying the finish in thin coats, using long strokes in the direction of the grain. Work your way from top to bottom, applying a thin even layer. Once you’ve covered the entire surface, let it dry as per the instructions on your finish container.
After the first coat is dry, sand the surface lightly with fine-grit sandpaper before applying the second coat of finish. Repeat this process until you’ve achieved the desired finish.
Applying the finish is an essential step in building a bookcase that looks and feels professional. Take the time to choose the right finish and apply it correctly, and you’ll end up with a beautiful bookcase that will last for years to come.
Now that your bookcase is built, it’s time to make it shine! Adding some personal touches and decorative items can really enhance the overall look of the piece. Here are some ideas to get you started:
These are just a few ideas to help dress up your bookcase and make it a focal point in any room. Keep in mind the style and decor of the room when selecting items to display on the bookcase. The possibilities are endless – have fun with it!
Once you’ve built your bookcase, it’s important to take care of it properly so that it can last for many years to come. Here are some tips to maintain and care for your bookcase:
Bookcases tend to accumulate dust over time. Regularly dusting the surfaces with a dry, soft cloth will prevent the buildup of dust and keep your bookcase looking clean.
When storing books on your bookcase, it’s important to make sure that they are properly aligned to prevent spine damage. Books should be stored upright and supported with bookends or dividers.
Direct sunlight can cause discoloration or fading of the wood on your bookcase. Keeping it away from direct sunlight and UV rays will ensure that the wood maintains its natural color and beauty.
Periodically check your bookcase for any signs of damage, such as cracks or loose joints. Fixing such issues immediately will help protect your bookcase from further damage.
Take care of your bookcase, and it will provide you with not only a useful function but also an aesthetic appeal. A well-maintained bookcase can be a long-lasting piece of furniture to enjoy for many years.
In conclusion, building a bookcase using your table saw is a satisfying and rewarding project that can add value to your home and showcase your woodworking skills. With the right materials and tools, attention to detail, and some patience, you can create a beautiful piece of furniture that will last for generations.
When selecting the wood for your bookcase, take some time to consider the grain, color, and durability. Measuring and cutting the pieces accurately will ensure that the bookcase is stable and sturdy. By creating the sections of the bookcase, you can customize the design to your liking, while assembling the pieces requires some precision and finesse.
Sanding and finishing your bookcase will bring out the natural beauty of the wood and add protection. Finally, adding some decorative elements can really make the bookcase stand out. To keep your bookcase looking its best, perform simple maintenance and care over time. Follow these steps, and soon you’ll have a beautiful bookcase to display your favorite books and decorative items.