Beautiful Plants For Your Interior
Beautiful Plants For Your Interior

To make a rip cut on a miter saw, set the saw blade to the desired angle and the fence to the width of the cut. Then, turn on the saw and slowly and steadily push the material through the blade.
Do you need to make a rip cut on a miter saw? It can be a daunting task to take on, especially if you’ve never done it before. But, with the right supplies, preparation, and technique, you can make a rip cut on a miter saw with ease. In this blog, I will walk you through all the steps you need to take to make a perfect rip cut. From gathering the necessary supplies to cleaning up your work area afterwards, I will share my experience and knowledge of how to make a rip cut on a miter saw.
Before you begin cutting with your miter saw, it’s important to have all of the necessary supplies on hand. Start by gathering the following items: safety glasses, a miter saw, a tape measure, a pencil, a speed square, a push stick, and a scrap block of wood.
Safety glasses are a must for any woodworking task. Your eyes should be protected at all times, so make sure you have your safety glasses ready to go.
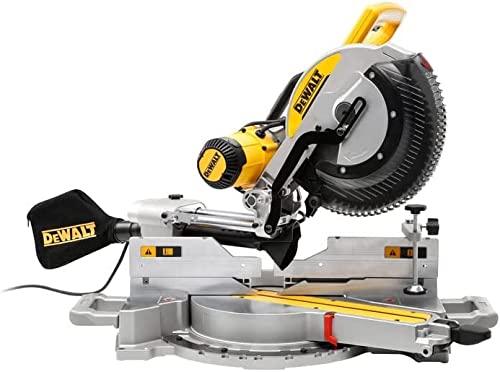
Your miter saw of course is the star of the show, so make sure it’s in good working condition. It’s important to check the blade and ensure it’s properly aligned and tightened.
Having a tape measure, pencil, and speed square will ensure that all of your cuts are precise. The tape measure allows you to measure the width of the wood you’ll be cutting, and the speed square will help you to mark the wood at the correct angle.
Lastly, you’ll need a push stick and a scrap block of wood. The push stick will help you to make the cut safely, and the scrap block will give you a surface to practice cutting on.
Once you have all of your supplies gathered, you can begin making your rip cuts on your miter saw.
Before making any rip cut on the miter saw, it’s important to prepare your work area. Start by clearing away any clutter or debris on the cutting surface, and make sure the material you’re cutting is secured firmly to the table. To ensure accuracy and safety, you should use a clamp to secure the material to the table.
Once your work area is prepared, it’s time to adjust the miter saw for the cut you’re trying to make. If you’re making a rip cut, you’ll want to set the saw to a 90-degree angle. The blade should also be adjusted so that it’s as close to the edge of the material as possible. Make sure the blade is angled away from the material, so that when you make the cut, the blade will be cutting away from you.
If your miter saw has a built-in dust collection port, it’s a good idea to attach a dust collection bag before you make the cut. This will help keep the work area clean and free of sawdust.
Finally, make sure to wear safety gear while making the rip cut. This includes safety glasses, gloves, and a dust mask. Once you’re set up and ready to go, you’re ready to make the rip cut on your miter saw.
Before you can make a rip cut on a miter saw, you need to set the miter saw blade correctly. To do that, you’ll need to make sure the blade is at the right angle and the right size.
First, make sure the blade is at the right angle. For a rip cut, you’ll need to make sure the blade is at a 90 degree angle. To do this, use a carpenter’s square and adjust the blade so that it’s perpendicular to the miter saw’s table.
Next, you’ll need to make sure the blade is the right size. To do this, you’ll need to measure the width of the cut you want to make. If the blade isn’t large enough, you’ll need to replace it with a larger one. Make sure you use the correct blade size for the material you’re cutting.
Once the blade is at the right angle and the right size, you’re ready to make a rip cut on your miter saw. Make sure to double-check the angle and size before you get started. This will help you make a precise cut and ensure the safety of yourself and anyone else in the vicinity.
Making markings on your workpiece is an essential step when it comes to making a rip cut with a miter saw. Before you get started, make sure you have a good quality pencil or pen to mark the necessary cut lines. You’ll also need a straight edge or ruler to make sure your marks are perfectly straight.
Once you’ve marked the area you want to cut, it’s important to ensure the marks are perfectly aligned with the saw blade. You can check this by clamping the workpiece securely onto the saw table and lowering the saw blade until it’s just above the workpiece. Make sure the saw blade is aligned with the marked lines on your workpiece.
Now that you’ve made sure your marks are perfectly aligned, it’s time to make the rip cut. Make sure to use a slow and steady speed as you push the workpiece through the saw blade. Make sure to keep your hands away from the saw blade at all times, as this can be dangerous.
Before making a rip cut on a miter saw, you’ll need to make sure the workpiece is secure. Fortunately, this is easy to do. Start by loosening the hold-down clamp on the saw table. Then, place the workpiece against the miter saw fence and slide the clamp forward so that the workpiece is firmly held in place. For a even more secure hold, use a hold-down jig or clamp. This will help ensure the workpiece stays in place while you’re making the cut.
Once the workpiece is secure, adjust the saw blade angle to the desired angle and turn the saw power switch to “on”. Make sure your hands are away from the blade before you start the cut. When ready, start the cut in a smooth, steady motion and finish it in the same way.
You can now make a rip cut on your miter saw. Just make sure to secure the workpiece properly and you’ll be ready to start cutting.
Making a rip cut on a miter saw is a great way to efficiently and accurately cut down long boards. With a few simple steps, you can make perfect rip cuts every time.
First, make sure the saw blade is set to the desired depth. If it is set too deep, the saw won’t be able to cut through the entire board. If the blade is set too shallow, the board won’t be cut all the way through.
Next, measure the board and mark the cut line. Make sure the line is straight and true. This will ensure that the rip cut is clean and accurate.
Finally, turn on the saw and carefully push the board against the blade. Keep a firm grip on the board and make sure it is securely in place before pushing it against the blade. Slowly and steadily push the board through the blade. Once the board has been cut, turn off the saw and remove the board.
Making a rip cut on a miter saw is a great way to cut boards with precision and accuracy. With a few simple steps, you can make perfect rip cuts every time.
Once you’ve set up your miter saw and adjusted the fence to the desired distance from the blade, it’s time to make the rip cut. Before you start, though, be sure to make sure the workpiece is firmly clamped down on the table. Once the workpiece is secure, you can begin cutting.
When the cut is complete, you’ll need to remove the workpiece from the miter saw table. To do this, simply loosen the clamps and turn off the saw. Once the saw is off, you can lift the workpiece off the table and set it aside to cool down before handling it.
Safety should always be your top priority when using a miter saw. Make sure to keep your hands away from the blade while it’s still running, and be sure to unplug the saw before removing the workpiece.
By following these simple steps, you’ll be able to safely and successfully make a rip cut on your miter saw table.
Making a rip cut on a miter saw requires precision and accuracy. Before you start, it’s important to make sure your work area is clean and organized. Clear away any clutter and debris that might be in the way of your saw blade, and make sure to remove any sawdust that might be left over from previous projects. If you have a dust collector, turn it on to ensure your work area is well-ventilated.
To ensure the safety of your project, make sure to double-check that all of the guards and safety mechanisms on your saw are properly aligned and secured. If any of them are damaged or not working as they should, replace them with new parts before you start cutting.
Once your work area is clean and safe, it’s time to start your rip cut. Place your workpiece firmly against the miter saw fence and adjust the blade angle to the desired angle. Make sure the blade is secured in its housing and that the blade guard is in place. Then, switch on the saw and slowly guide your workpiece through the blade. Be sure to keep your hands away from the blade and be mindful of the dust and debris that may be produced.
When your cut is complete, switch off the saw and unplug the cord. Allow the blade to come to a complete stop before cleaning up the work area. Vacuum up any sawdust, wipe down the blade guard, and make sure the guards and safety mechanisms are properly secured. Lastly, make sure to store your saw and workpiece in a safe place.
By taking the time to clean up your work area and ensure that all safety precautions are taken, you can make sure that your rip cut on the miter saw is successful.
For making a rip cut on a miter saw, you will need a circular saw. Make sure you choose one that is suitable for the material you are cutting. A circular saw will provide a straight, smooth and precise cut. Additionally, it may be helpful to use a straight edge or guide to keep your cut even.
Before making a rip cut on a miter saw, you should make sure to properly measure and mark the wood before you begin. You’ll also want to make sure that your saw is set up correctly and that the blade is sharp. Additionally, ensure that the saw is set to the correct depth and angle for the cut you’re making. Lastly, you should wear safety goggles and gloves to protect yourself from kickback and other possible hazards.
To ensure your workpiece is secure before cutting, use a miter saw with a fence or a clamp to hold the workpiece in place. Make sure to double-check the placement of the workpiece before beginning the cut. It is also a good idea to wear safety goggles and gloves to protect your eyes and hands.
To adjust the miter saw blade correctly, you should start by making sure the saw is unplugged. Then, adjust the fence to the desired angle and bevel. Make sure the blade is properly tightened and secure. Finally, adjust the blade depth to ensure it is the correct depth for the material you are cutting.
Making a rip cut on a miter saw is relatively easy. First, adjust the saw blade to the desired cutting width. Next, adjust the miter angle to the desired cut angle. Finally, secure the wood in the miter saw’s fence. Once the wood is secure, start the saw and slowly feed the wood through the saw blade. Apply moderate pressure as the wood passes through the blade, and be sure to keep your hands away from the blade. Once the cut is finished, turn off the miter saw and let the blade come to a complete stop.
Making a rip cut on a miter saw is a simple way to get accurate and precise cuts. As long as you have the right tools and instructions, you can easily make a perfect rip cut. Just remember to keep the workpiece firmly secured, adjust the angle and make sure your saw is properly calibrated. Once you’ve done that, you’re ready to go. Just take your time, and enjoy the process of making a rip cut with a miter saw. After all, when you’re done, you’ll have a perfectly straight and accurate cut.