Beautiful Plants For Your Interior
Beautiful Plants For Your Interior

To make a compound miter cut on a miter saw, adjust the saw blade to the desired angle and bevel. Then, secure the workpiece and make the cut.
Are you looking to make a compound miter cut on a miter saw? If so, you’ve come to the right place. Making a compound miter cut isn’t as difficult as it sounds and, with the right tools and a bit of know-how, you can create stunning cuts with your miter saw. In this article, I’ll show you how to make a compound miter cut on a miter saw, from gathering the necessary materials and tools to making the actual cut.
So if you’re ready to start learning, let’s get to it! First, you’ll need to choose a suitable work area and gather the necessary materials and tools. Then, you’ll need to prepare the miter saw, measure and mark the cut length, calculate the miter angle, and adjust the miter saw to the angle. Finally, you’ll need to secure the material to the saw and make the compound miter cut.
With these easy steps, you’ll be able to make beautiful compound miter cuts on a miter saw in no time.
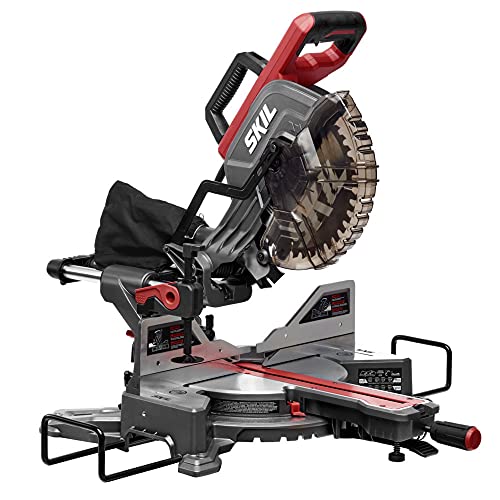
Before you can make a compound miter cut on a miter saw, you’ll need to gather the necessary materials and tools. The most important tool you’ll need is a miter saw itself. Make sure the saw you have is suitable for compound miter cuts, which typically means that it can bevel, or tilt, the saw blade in both directions.
You’ll also need the material you plan to cut. This might include wood, metal, or PVC, depending on the project. Be sure to measure twice and cut once to get the best results.
In addition to your miter saw and the material you plan to cut, you’ll need a few additional tools. A safety mask is always a good idea when working with power saws, and a set of clamps will help you keep the material you are cutting secure. You may also want to use a protractor to make sure that your compound miter cut is perfectly angled.
Once you have all the necessary materials and tools, you’re ready to make your compound miter cut. If you’re new to using a miter saw, be sure to practice on scrap material first to get comfortable with the saw and how to make the cut safely.
When you are ready to make a compound miter cut on your miter saw, the first step is to select a suitable work area. You need a space that is clean, well lit, and that provides ample room for you to move around. Make sure that your saw is firmly secured to the workbench and that the miter saw is positioned at a comfortable height for you to work safely.
Also, ensure that the work area is free of any clutter or shards of wood that could be hazardous. If possible, position the miter saw so that it is facing away from a wall or any other obstacles that could impede cutting. It is also important to have a stable and level surface to work on, as this helps to ensure an accurate cut.
Finally, when you have chosen an appropriate work area, it is important to remember to wear protective equipment such as safety glasses, gloves and a dust mask. This will help keep you safe while you make your compound miter cut.
If you want to make a compound miter cut on a miter saw, the first thing you need to do is prepare the saw. Start by double-checking that the saw is properly installed and securely mounted on a sturdy, flat surface. Make sure the saw blade is in good condition, with no nicks or cracks, and that it is properly aligned. Also, check that the saw is level and properly aligned with the work surface.
Next, make sure you have the right cutting blade for the job. A standard miter saw blade has a flat tooth profile and is suitable for cutting most types of wood, while a non-ferrous saw blade is better for cutting aluminum and other non-ferrous material. Once you have the right blade, you can mount it onto the miter saw, making sure it is properly secured and aligned.
Finally, adjust the miter saw to the desired angle. On most miter saws, this is done by adjusting the miter gauge – usually a simple dial at the back of the saw. Set the angle to the desired degree and lock it in place. Once the angle is set, you’re ready to make your compound miter cut.
Making a compound miter cut on a miter saw can seem intimidating, especially for beginners, but with the right measurements and a few simple steps, you can make a perfectly precise cut.
Start by measuring the length of your cut and marking it on the material. It’s important to be as exact as possible here, so use a tape measure and mark the length with a pencil or marker. If you’re making a compound miter cut, you’ll also need to measure and mark the angle of the cut.
Once you have the length and angle marked, make sure your miter saw is set to the right degree of angle. The angle you measure should match the angle of the saw blade. If it’s not, adjust the miter saw’s angle setting until it matches.
Now you’re ready to make your cut – but first, double check that your material and saw blade are aligned. Then, carefully guide the material through the saw blade, making sure to keep your hands clear of the blade.
And that’s it – you’ve made a perfect compound miter cut! Just remember to measure and mark the length and angle accurately before you start, and you’ll have success every time.
Making a compound miter cut on a miter saw is much easier than it may seem. To get started, you need to calculate the miter angle. To calculate the miter angle, you’ll need to measure the angle of the two pieces of wood you’ll be cutting. The miter angle should be the angle between the two pieces of wood.
Once you have the angles of the two pieces of wood, you need to add the angles together to get the total miter angle. For example, if one piece of wood is at a 30 degree angle and the other is at a 45 degree angle, then the miter angle will be 75 degrees.
Then, you need to adjust the miter saw to the miter angle you’ve calculated. To do this, simply use the angle settings on the miter saw. Most miter saws will have settings up to 45 degrees in both directions (left and right). If the miter angle you need is higher than 45 degrees, then you’ll need to adjust the saw to the highest setting and then use a protractor to adjust the angle further.
Once you’ve adjusted the miter saw to the correct angle, you’re ready to make the compound miter cut. Just be sure to double check that the miter angle is correct before you begin cutting.
Making a compound miter cut on a miter saw requires you to adjust the saw to the proper angle. This can be done easily by following a few simple steps.
Start by setting the miter saw to the angle of your choosing. If you don’t already know the angle, you can use a protractor to measure it. Once you’ve set the saw to the correct angle, you’ll need to adjust the bevel and bevel lock. The bevel is the angle at which the blade is tilted in relation to the table. You can adjust the bevel by using the bevel and miter scales, which are usually located on the front of the saw. The bevel lock can be adjusted with the bevel lock lever.
Next, you’ll need to adjust the miter saw’s miter angle. This angle will determine the angle of your cut. To adjust the miter angle, use the miter angle scale on the side of the saw. The miter angle can be adjusted from 0 to 48 degrees.
Finally, you’ll need to adjust the miter saw’s miter fence. This fence should be adjusted so that the blade is parallel to the edge of the material you’re cutting. To adjust the miter fence, use the miter fence scale on the side of the saw. The miter fence can be adjusted from 0 to 48 degrees.
Once you’ve adjusted all of the necessary components, you’ll be ready to make your compound miter cut.
To make a compound miter cut, you must secure the material to the saw. It’s essential to use the right tools to ensure a precise and secure cut. You can use clamps to secure the material to the saw table, and make sure the material is held firmly in place while you cut. Alternatively, you can use a vise to hold the material in place with greater precision and safety. If you don’t have clamps or a vise, you can use double-sided tape to secure the material to the saw. This requires that you use a firm grip while cutting, and it may be more difficult to maneuver the material while cutting, so use caution.
No matter which method you choose, make sure you secure the material firmly in place before you start cutting. That way, you can use the miter saw safely, and make accurate compound miter cuts.
Making a compound miter cut with a miter saw is a lot easier than it sounds! You’ll just need to adjust the angle of the saw blade in order to get the perfect cut. Here’s what you’ll need to do:
First, place your workpiece on the saw table and adjust the saw blade angle to your desired angle. Make sure that the saw blade is securely locked into place.
Next, move the saw head to the desired position and begin cutting. When the saw blade reaches the end of the cut, make sure you push the saw head back to the starting position.
You’ll also need to adjust the miter saw fence to the desired angle. To do this, simply loosen the miter saw fence and then rotate it to the desired angle.
Finally, make sure you check the accuracy of your compound miter cut by using a square or triangle.
A compound miter cut is an angled cut with both miter and bevel adjustments. It is done using a miter saw. The saw is adjusted to the desired angle and a cut is made. This type of cut is used to join two pieces of wood at an angle and is especially helpful when making complex trim pieces or frames.
A miter saw works by rotating a blade on a pivot arm. You can adjust the angle of the blade by rotating the arm to make a compound miter cut. You place the material you want to cut against the fence and the blade will make the cut. The miter saw can also be adjusted for depth, so you can make deeper cuts if necessary.
When making a compound miter cut on a miter saw, it is important to consider the angles and measurements of the cut. Mark the angles and measurements on the wood before cutting to ensure accuracy. Pay attention to the direction of the blade and the setting of the miter saw to get the desired cut. Make sure the saw is securely held in place so the cut is precise. Finally, take safety precautions, such as wearing safety glasses and gloves, to ensure your safety.
To make a compound miter cut, you’ll need a miter saw, a sharp saw blade, safety glasses, and a tape measure or ruler. Additionally, it may be helpful to have a pencil, a speed square, and/or a miter gauge. Make sure to wear protective gear while working with the saw blade.
To adjust your miter saw for a compound miter cut, first loosen the miter lock and adjust the saw to the desired angle. Then, tighten the miter lock to secure the blade at the angle. Next, adjust the bevel angle and lock it into place. Finally, turn on the saw and make the cut.
Making compound miter cuts on a miter saw may seem intimidating at first, but with a few simple steps, you can be making those cuts like a pro in no time! To begin, make sure to double check that your saw is properly calibrated. After that, you’ll want to make sure you have the correct blades and that they are properly secured in the saw. Once that is done, you can adjust the miter and bevel settings as needed. Finally, you’ll want to measure and mark your compound miter cut and make sure the cut is made with precision.