Beautiful Plants For Your Interior
Beautiful Plants For Your Interior

Have you ever looked at a beautiful piece of furniture and wondered how it was made? Chances are, a table saw was involved in the process. The table saw is a versatile and powerful tool that allows woodworkers to create intricate designs and flawless cuts. However, working with a table saw requires skill and technique, especially when it comes to joinery and inlay cuts.
Before we dive into the advanced techniques for working with a table saw, let’s talk about safety precautions. The power and speed of a table saw can be dangerous if not handled properly. So, it’s essential to wear protective gear and follow safety guidelines.
Once you’ve got safety covered, You’ll learn about the different types of joinery techniques and materials required for creating them. Techniques such as dovetail and box joints can create strong and long-lasting connections between pieces of wood. We’ll also teach you how to prepare the wood for joinery and how to measure and mark accurately.
In addition to joinery techniques, you’ll also learn about inlay cuts. This decorative method involves inserting contrasting wood or other materials into a groove cut into the wood. But before that, we’ll cover the materials required for inlay cuts and the best ways to prepare and cut the wood.
As with any tool, maintenance is crucial to keep a table saw functioning correctly. We’ll provide tips for regular care and upkeep to ensure that your saw stays in top shape.
By the end of this article, you’ll have the knowledge and skills to take your woodworking to the next level. So, grab your safety gear, and let’s get started!
A table saw is a powerful tool that can accomplish numerous woodworking tasks with ease. However, it can also be incredibly dangerous if used incorrectly. Therefore, ensuring safety when using a table saw is of utmost importance. Here are a few critical safety measures to keep in mind:
By following these safety precautions, you can ensure that your woodworking project remains injury-free and a success.
Joinery is the process of joining two pieces of wood or other materials, without using nails, screws, or other fasteners. There are several types of joinery techniques that you can use, depending on the project you’re working on, the materials you’re using, and your own personal preferences.
One of the most basic and common types of joinery is the butt joint, where you simply butt two pieces of wood together and glue them. This technique is often used for simple projects or when you have limited supplies.
Another type of joinery is the rabbet joint, where you cut a groove or recess into one piece of wood so that it fits snugly over a second piece of wood. This type of joint is often used for building cabinets, bookshelves, or other furniture.
The dowel joint is another popular joinery technique, where you drill holes into two pieces of wood and then insert a dowel, or wooden peg, into both holes. This technique is often used for building tables, chairs, or other items that need to support weight.
Finally, there’s the mortise and tenon joint, which is one of the strongest and most durable types of joinery. This technique involves cutting a rectangular hole, or mortise, into one piece of wood, and then creating a corresponding tenon, or tongue, on the second piece of wood. The tenon is then inserted into the mortise and secured with glue.
Overall, there are a variety of joinery techniques that you can use to create strong, durable, and beautiful pieces of furniture or other items. With the right materials, tools, and techniques, you can create pieces that will last for years to come.
Before starting with the joinery process, it is imperative to have the right materials in hand. Here are some of the essential tools and materials required for joinery:
With these tools and materials, you can start your joinery process with ease. However, always remember to take proper safety precautions before starting any cutting or joining process on a table saw.
Before starting the joinery work, it is essential to take some preparatory steps to ensure your woodworking project goes smoothly. Preparing the wood for joinery involves making sure the wood has the proper moisture content, is flat and straight, and is free of defects like knots, splits, or cracks.
To begin with, acclimate the wood to the room where it will be used. This will allow the wood to adjust to the moisture content of the room and prevent any warping or splitting later on. Use a moisture meter to ensure the wood’s moisture content is between 6-8% for indoor projects.
Next, inspect the wood for defects. Look for any knots, splits, or cracks that could weaken the wood and interfere with the joinery work. Use a hand plane, jointer, or a sander to flatten and straighten the wood, ensuring its edges are square.
It is always advisable to over-cut the wood to allow for final trimming to size during the joinery process. This will ensure you have a perfectly-sized piece of wood to work with.
By taking these preparatory steps, you can ensure the wood you’re working with is of high quality and will make for a more professional-looking finished woodworking project.
A crucial step in joinery is measuring, marking, and cutting the wood pieces needed for the joint. It’s important to be precise as even a small mistake can affect the integrity of the joint.
To begin with, decide on the type of joint you plan to create and choose your method accordingly. Take accurate measurements of the wood and mark it with a pencil or a marking knife. This will help you align the pieces properly when it’s time to assemble them.
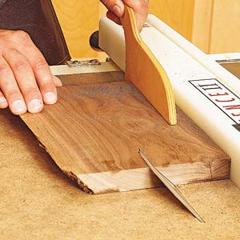
When cutting the wood, use a table saw with a blade appropriate for the thickness of the wood. Ensure that the blade height and fence are set accurately to the required angles and position as per the type of joint. Additionally, use a push stick or a push block to keep your hands safe while guiding the wood through the blade.
Remember to keep the blade guards and anti-kickback pawls in place and in working order to ensure safety while cutting. Keep your workspace clean and uncluttered so you can move around safely while handling your wood pieces.
Following these safety tips and precise cutting techniques will help ensure your joint fits together perfectly and will create a solid and stable finished product.
One of the most important aspects of mastering joinery cuts is to learn the art of properly aligning the saw blade. This is critical because it determines how the joint will fit together. Use a test cut on a scrap piece to ensure everything is aligned, and then measure the thickness of the cut to determine if the joint is tight enough.
Another important technique is to use a stop block. This is a simple and effective tool that ensures uniformity in your cuts. By setting the block at the same distance from the blade each time, you can achieve consistency in the size and shape of your joints. Also, if you need to make multiple cuts of the same size, repositioning the block can save time.
Adding a sacrificial fence on your saw can help to avoid tear-out. Tear-out occurs when the wood chips and splinters as the blade cuts through it. This can be annoying and frustrating, especially when working with expensive wood. A sacrificial fence protects the surface of the wood by absorbing the blade’s bite, producing a clean joint without tearing up the surface.
Finally, another practical technique is to use a dado set. It is a specialized blade set that can cut grooves or channels at different depths in the wood. It is an essential set of blades needed when building interlocking joints on a table saw. They can help you make strong and secure joints in a quicker and more efficient way.
By incorporating these techniques into your work, you can make precise and accurate joinery cuts with ease.
Inlay is the process of cutting a design or image in a different material and fitting it into a groove in a piece of wood. It’s a beautiful way to add intricate detailing to a piece of furniture or artwork. Inlay can be made from a variety of materials, including metal, shell, stone, or even other woods.
There are two primary types of inlay: geometric and pictorial. Geometric inlays consist of simple geometric shapes such as rectangles, circles, and triangles arranged in patterns. Pictorial inlays, on the other hand, are more complex and feature designs such as flowers, animals, or people.
To create an inlay, you need to first create a groove in the wood for the inlay to fit into. The groove needs to be precise and the exact size of the inlay material. The inlay material is then carefully cut to fit the groove and glued in place.
There are a few different methods for creating inlays, including using a router or chisel to carve out the groove or using a specialized inlay cutter or saw to make the cut. A template can be used to ensure the groove is the correct shape and size.
When choosing materials for inlay, it’s important to consider the color and texture of both the inlay material and the wood. The inlay material should stand out against the wood, but also complement its natural beauty.
Overall, inlay is a stunning technique that can take your woodworking projects to the next level. With the right tools and materials, you can create intricate designs that are sure to impress.
Inlay cuts are an intricate woodworking technique that requires a set of specialized tools and materials. Here are the necessary materials you’ll need to achieve excellent inlay cuts:
These materials will give you the necessary precision to ensure correctly sized inlays and tight-fitting joints. For more intricate designs, you may want to use a scroll saw in place of a coping saw to create the inlay’s shape.
Correctly selecting and preparing your materials before starting your work will help you achieve better results in less time. In the next section, we’ll discuss how to prepare the wood for inlay cuts.
Before you begin cutting the inlay on a piece of wood, it’s crucial to prepare the workpiece properly. Firstly, make sure that the wood has been carefully selected, and it should be free of any knots, cracks, and defects. Secondly, it’s essential to sand the surface of the wood. Sanding creates a smooth surface and removes any stains, paint or glue residue, which may affect the quality of the cut. It’s advisable to use a higher grit sandpaper, such as 220 grit, to create a smooth and clean surface.
Thirdly, it’s important to choose a suitable type of wood that complements the inlay design. A contrasting color of wood to the surrounding surface will help the inlay stand out more. For example, if the inlay design is a star shape, consider using a darker wood for the star, and lighter wood for the surrounding area. Fourthly, the wood should be selected in such a way that its grain runs parallel to the inlay cut. This way, you can achieve a clean cut and prevent the grain from tearing or chipping.
By preparing the wood for inlay cuts, you lay a solid foundation for a professional-looking piece of work. Remember, the quality of the final product is proportional to the quality of the preparation you put in.
Before you begin your inlay project, you need to be precise with your measurements and markings. This is essential for inserting pieces of wood or other materials into another piece of wood. The measuring step can be a bit tricky, as you want to ensure that the inlay fits snugly into the surface.
To start, take accurate measurements of the area where the inlay will be inserted. Use a ruler, protractor, or any other measuring tool to ensure that your measurements are precise. If you’re using a pattern for your inlay, take care to transfer the measurements to your material accurately.
Next, mark the outlines of your inlay design onto the material with a pencil, pen or marker. Make sure the marks are accurately placed and don’t smudge, as they will need to be visible throughout the cutting process.
Once you are satisfied with your markings, it’s time to cut the inlay part. The most common method of cutting inlays is with a scroll saw or a fret saw. With a scroll saw, you can make intricate cuts and curved shapes with ease. With a fret saw, you will need to follow the perimeter of your markings precisely.
Make sure that the blade is sharp and clean, as it ensures a cleaner and accurate cut. Remember to use a steady hand and gentle pressure to avoid any damage to the inlay.
In conclusion, measuring, marking, and cutting for inlay is an important process that requires precision and accuracy. By taking care during this step, you can create a beautiful piece of decorative woodwork that will impress everyone who sees it.
When it comes to creating inlay cuts, certain techniques can elevate the craftsmanship and precision of the end product. Here are a few special techniques to keep in mind when working with inlay cuts:
By following these special techniques for inlay cuts, one can produce high-quality work and create a product that is both visually appealing and structurally sound.
To keep your table saw in top working condition, regular maintenance is required. Here are few tips to ensure that your saw stays in good shape for years to come:
By following these simple steps, you can keep your table saw in excellent condition and reduce the risk of potential accidents. Regular maintenance will also ensure that you get the best possible results from your saw every time you use it.
In conclusion, learning advanced table saw techniques for joinery and inlay cuts is an excellent way to take your woodworking skills to the next level. However, before you start, it is essential to keep in mind the safety precautions involved when using a table saw. Always wear protective gear, and ensure the blade is sharp and set at the right height.
When it comes to joinery, selecting the right materials and carefully measuring and marking the wood is critical to achieve clean and precise cuts. There are various types and methods of joinery, from simple butt joints to complex dovetails, that you can explore.
Similarly, inlay techniques require a high level of precision and artistry, and using the appropriate materials and tools for the job is essential. From simple string inlay to intricate marquetry, the possibilities are endless.
Finally, regular maintenance of your table saw is crucial to ensure its longevity and optimal performance. By following the tips mentioned in this article, you can make the most out of your table saw and take your woodworking skills to the next level!