Beautiful Plants For Your Interior
Beautiful Plants For Your Interior

Are you tired of using a table saw without the proper tools? One essential tool for your cutting needs is a miter gauge. However, it can be challenging to choose the right one for your table saw. Fear not, as this guide will provide everything you need to know about choosing the perfect miter gauge for your work.
First and foremost, understanding the importance of a miter gauge for your table saw is crucial. It allows for precise angled cuts, ultimately enhancing the quality of your work. Next, we’ll explore the types of miter gauges and their features. With various options available, it’s important to know which type suits your needs best.
Once you’ve identified the different types of miter gauges, it’s time to consider the top qualities to look for in a miter gauge. These features will ensure a seamless cutting experience with your table saw. Additionally, evaluating your needs and finding the right miter gauge for your work is essential.
After you’ve chosen the best fit for you, installing and setting up your miter gauge correctly is vital for safety and accuracy. We’ll provide safety tips for using a miter gauge and maintaining it to ensure optimal performance. Lastly, we’ll touch on troubleshooting common miter gauge issues. Now, let’s explore the world of miter gauges and find the perfect match for your table saw.
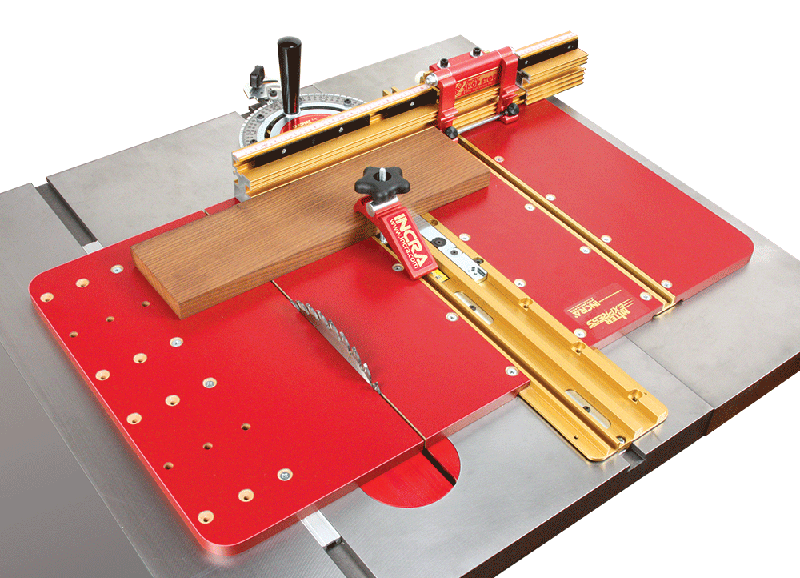
If you use a table saw regularly, you know how important accuracy and control are for making precise cuts. This is where a miter gauge comes in handy. A miter gauge is a device that helps you guide your workpiece through the blade at a desired angle. It attaches to the saw’s tabletop and slides back and forth on a guide.
The miter gauge ensures that your cuts are exactly where you need them to be on the workpiece, no matter the angle. This not only saves you time but ensures that you don’t ruin your materials by making uneven or crooked cuts. The precision a miter gauge offers is invaluable when working with material that requires a high level of accuracy.
When choosing a miter gauge, it’s important to consider your needs and the type of work you will be doing. Not all miter gauges are created equal. Some are designed with specific features to meet specialized needs, while others are built for affordability and simplicity. In the next sections, we’ll go through the various types of miter gauges available and the considerations you need to make when choosing one that suits your needs.
There are several types of miter gauges available on the market, each with unique features that make them suitable for specific cutting applications. Understanding the differences between them will help you select the right one for your table saw.
In conclusion, when choosing a miter gauge, the feature set and level of precision needed will depend on the type of cuts you will be making on your table saw. Understanding the types of miter gauges available will help you select the right one that meets your specific needs.
When choosing a miter gauge for your table saw, it’s important to keep a few key considerations in mind. First and foremost, make sure the miter gauge is compatible with your specific saw model. Additionally, consider the range of angles the miter gauge can handle – will you need a wide range of angles or just a few basic options? Look for a miter gauge with clear and easy to read angle markings, as well as a sturdy and secure locking mechanism. Finally, think about your budget and how often you will be using the miter gauge – investing in a high-quality option may be worth it if you frequently work on projects that require precise angle cuts. By keeping these factors in mind, you can find the right miter gauge to meet your specific needs and create accurate cuts every time.
When looking for the best miter gauge for your table saw, it is important to consider the qualities that will make your woodworking experience safe and efficient. Here are the top qualities to look for in a miter gauge:
By considering these qualities, you can select the perfect miter gauge that is perfect for your woodworking needs and preferences.
When it comes to choosing the right miter gauge for your table saw, it’s important to take into consideration the type of work you will be doing. Not all miter gauges are created equal, and some are better suited for certain types of work than others.
If you plan on doing precision work, you’ll want to look for a miter gauge that has a high level of accuracy and adjustability. If you frequently make angled cuts or do a lot of crosscutting, you may want to look for a miter gauge that has a large range of angles and can accommodate larger workpieces.
Additionally, it’s important to consider the materials you’ll be working with. If you work primarily with thicker or heavier materials, you may want to look for a miter gauge that has a more robust build and can handle the weight of your workpieces.
By taking the time to evaluate your needs and carefully considering the features and capabilities of different miter gauges, you can ensure that you choose a tool that will help you achieve your desired results and make your work easier and more efficient.
Now that you have found the perfect miter gauge for your table saw, it’s time to install and set it up for use. Follow these steps for a seamless setup:
Before installing your miter gauge, ensure that your table saw is level and in good working condition. Also, check the width of your table saw’s miter slot to ensure that the miter gauge you have purchased is compatible.
The miter bar is the part of the miter gauge that slides into the miter slot of your table saw. If your miter bar is too loose or too tight, it can cause inaccuracies in your cuts. To adjust the miter bar, use the screw or bolts that came with your miter gauge to loosen or tighten it until it fits snugly into the miter slot.
Before using your miter gauge, ensure that it is calibrated for accuracy. To do this, set your miter gauge to a specific angle and use a square to check that the gauge is aligned with the blade. If it isn’t, adjust the gauge until it runs parallel with the blade.
Before making any cuts, it’s always a good idea to test your miter gauge with scrap material to ensure that it is set up correctly and is working accurately.
Setting up and installing your miter gauge is an essential step in ensuring precise cuts and safety in your workshop. Follow these steps and always refer to your manufacturer’s instructions for specific guidance.
Using a miter gauge on your table saw can be dangerous if not handled properly. Here are some safety tips to keep in mind while using a miter gauge:
Remember, proper use of a miter gauge can significantly enhance your performance and yield better results. It’s important to prioritize safety and take extra precautions to prevent any accidents or injuries.
One of the most important tools for your table saw is the miter gauge, and properly maintaining and caring for it ensures longer life and better performance. Here are a few tips to help you keep your miter gauge in top condition:
By following these simple maintenance tips, you can keep your miter gauge in optimal condition and ensure accurate cuts every time you use it.
While a good-quality miter gauge can make your woodworking job easier, it can also give you a headache when it stops working efficiently. Here are some common issues that people encounter with their miter gauge and how to troubleshoot them:
By following the tips shared above, you can troubleshoot common miter gauge issues and ensure your woodworking projects go smoothly.
So, there you have it – a comprehensive guide to choosing the right miter gauge for your table saw! We hope that this article has been helpful in shedding light on the importance of a high-quality miter gauge and the key factors to consider when making your purchase.
Remember, every woodworker has unique needs and preferences, so take the time to evaluate your own requirements and find the miter gauge that best fits them. Whether it’s a basic miter gauge for occasional hobby projects or a high-end digital gauge for precision commercial work, be sure to choose a gauge that offers the features, accuracy, and durability you need to achieve your goals.
Of course, safety is always paramount when using any woodworking tool, so always follow proper safety guidelines and take extra care when handling your miter gauge. And with the right care and maintenance, your miter gauge will provide you with years of reliable use.
So, take your time and find the right miter gauge for you – happy woodworking!