Beautiful Plants For Your Interior
Beautiful Plants For Your Interior

To make curved cuts with a compass saw, adjust the blade length and hold the saw firmly with both hands. Make sure the saw is perpendicular to the material before beginning to cut. Move the saw at a steady rhythm, following the desired curved line.
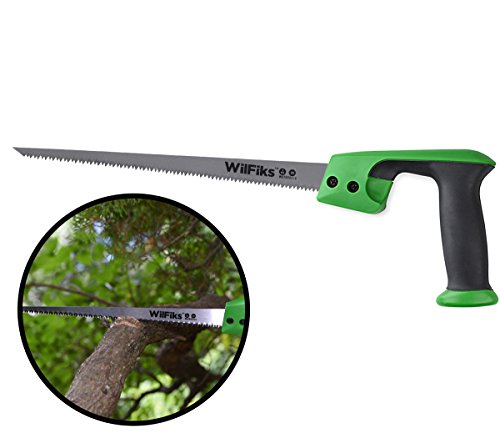
Do you have a project that requires you to make curved cuts? If so, you’ll need to know how to properly use a compass saw. It’s not as difficult as it sounds. With the right preparation, you can make clean and precise curves with ease. In this blog, you’ll learn how to prepare the material and the compass saw, mark the cutting line, cut the curve, adjust the cut, and finish the edges. With this knowledge, you’ll be able to make beautiful curved cuts for your projects.
When it comes to making curved cuts with a compass saw, the materials you choose for the project are just as important as the tool itself. You want to make sure you’re using the right kind of material to avoid any problems or disasters.
To start with, make sure the material you’re using is thin enough for the saw blade to easily cut through. If the material is too thick, you’ll have a difficult time making the cuts and the saw might even get stuck.
You also want to make sure the material is straight and smooth. If it’s twisted or warped, you won’t be able to make accurate curved cuts. The same goes for if the material is bumpy or has grooves.
Finally, make sure you’re using a quality material. Cheap materials may seem cost-effective in the short term, but they won’t hold up to the saw’s blade and won’t provide the consistent results you’re looking for.
By following these steps and using the right materials, you’ll have no problem using a compass saw to make the perfect curved cuts.
Preparing the Compass Saw is a crucial step in achieving a successful curved cut with a compass saw. Before you start, make sure the blade is sharp and the saw is firmly attached to the handle. If the blade is dull, the saw won’t be able to produce a clean cut. Also, check if the blade is securely fastened to the handle. If it’s not, you risk having an unbalanced saw that can lead to an inaccurate cut.
When you’re certain the saw is ready, you can begin prepping it for the curve. First, adjust the depth of the blade so it can make a deep enough cut in the material. If the cut is too shallow, the saw won’t be able to get through the material. After that, adjust the tension screw on the saw to make sure the blade is tight enough for a clean cut.
Finally, make sure the handle is comfortable enough for you to use. A saw that fits your hand ergonomically will help you maintain control and make a more accurate cut. Once the handle is adjusted to your liking, you’re ready to make your curved cut. With a well-prepared compass saw in hand, you’ll be able to make clean and precise cuts.
When you’re working with a compass saw, you’ll need to mark the cut line first. This is a simple but essential step, so it’s important to take your time and get it right.
Start by using a pencil and ruler to draw the line you want to cut. This should be done on the surface of the material you’re cutting, so you know exactly where to place the saw blade. Make sure the line is straight, so your cut will be even and accurate.
Once you have the line drawn, you’ll need to mark the cut line. To do this, use a compass saw and make a shallow cut along the line. This cut is known as a tick mark and will allow you to follow the line accurately when you make the actual cut. Make sure you don’t go too deep with the tick mark, as this can weaken the material or cause it to break.
Marking the cut line is an important step in using a compass saw. If you take the time to get it right, it will ensure you make an accurate cut and get the best results from your project.
Using a compass saw to make curved cuts is a great way to add some flair to your projects. This type of saw features a thin blade that allows for intricate curves that match the contours of your workpiece. To properly use a compass saw for curved cuts, you’ll need to consider a few key points.
First, make sure the blade you’re using is sharp. A dull blade will make it more difficult to cut a clean line, and the results won’t be as precise. Also, you’ll want to use a light touch when cutting. This will help you maintain control of the saw and make it easier to create smooth, even curves.
Next, you’ll need to adjust the tension on the blade. This will affect the tightness of the curves you’re able to cut, so make sure it’s set correctly. A tighter tension will allow you to make tighter, more intricate curves, while a looser tension will let you make larger, more sweeping curves.
Finally, position your saw at an angle when cutting. This will help you get a smoother cut and minimize the risk of the blade slipping or losing control. If you’re having trouble getting the right angle, you can always use a guide to help guide the saw in the right direction.
By following these tips, you’ll be able to make curved cuts with your compass saw like a pro.
Creating clean edges when using a compass saw is essential for achieving professional results in your woodworking projects. Here are some tips to ensure you get the perfect cut.
Start by selecting the right saw blade for the job. For example, if you’re cutting hardwoods, use a blade with more teeth and a more aggressive tooth design to ensure a smooth cut. If you’re cutting softer woods, use a blade with fewer teeth and a less aggressive tooth design.
Once you’ve got the right blade, you’ll want to make sure your saw is properly set up. Make sure the blade’s tracking is set correctly and that it’s mounted securely to the saw’s frame. If the blade isn’t tracking properly, it can produce uneven cuts.
Now that your saw is set up properly, it’s time to make your cut. When making a curved cut, it’s important to move the saw in a slow, steady motion. Moving too quickly or too slowly can cause the blade to wander off the line, resulting in an uneven cut.
Finally, take your time. Take your time when making the cut and don’t rush the process. A slower, more controlled cut will result in a cleaner, smoother edge.
With these tips in mind, you can confidently use your compass saw to create clean, professional curved cuts for any of your projects.
When cutting curves with a compass saw, it’s important to adjust the cut so that your saw blade has the right size and shape. The best way to do this is by loosening the wingnut on the side of the saw and moving the saw blade up or down. You can also adjust the angle of the blade to make it easier to follow the curve.
To make sure your saw blade is the right size for the curve, take a look at the blade itself. If it’s too wide, you won’t be able to follow the curve, and the cut won’t be accurate. If it’s too narrow, you’ll have difficulty making a clean cut.
Once you’ve adjusted the cut, you’ll need to secure it. Tighten the wingnut on the side of the saw, and make sure the blade is firmly held in place. If necessary, you can use a wrench to further secure the blade.
Finally, it’s important to test your adjusted cut before you start cutting. Start the saw and make sure that it follows the curve accurately. If it doesn’t, adjust the cut again until you get the desired result.
Adjusting the cut of your compass saw is an important step in making sure that your cut is accurate and clean. With a few simple steps, you can make sure that your saw follows the curve properly and that your cuts come out perfect every time.
Now that you have made the initial cut to your curved line using the compass saw, you are almost done! To finish the cut, you need to take a few extra steps to ensure the best possible outcome.
First, make sure that the saw blade is still lined up with the line that you are cutting. If it’s not, adjust it, and continue cutting until you reach the other end of the line. You may need to make multiple passes to get to the other end.
Next, make sure that you are cutting at an angle that is appropriate for the type of wood you are working with. For example, some woods, such as hardwoods, require a greater angle of attack than softer woods.
Finally, when you think you are close to the end of your cut, slow down and use the back of the saw blade to make sure the cut is clean and precise. It is also important to ensure that you are not cutting too deeply, as this can cause the wood to splinter or crack.
Once you have finished the cut, you can sand it down to get a smooth finish.
The best way to make curved cuts with a compass saw is to use a steady hand and start at the outside of the curve. Carefully guide the saw along the curve, keeping the saw blade straight and perpendicular to the workpiece. Make sure to keep the saw blade in constant contact with the surface of the workpiece until the cut is complete.
Before cutting a curve with a compass saw, you should keep in mind a few key points. Choose a suitable saw blade for the material you are cutting, and make sure it is sharp. You should also use clamps to secure the material in place, and ensure that the saw has a good grip. Finally, make sure the saw is firmly positioned at the start of the cut, and guide it slowly and steadily along the curve.
The best technique for cutting a curved line with a compass saw is to slowly and carefully guide the saw along the line of the compass. Make sure to stay close to the line and keep the saw moving in a smooth, consistent motion. If possible, practice on scrap materials before cutting into the material you are actually trying to cut. Be sure to always wear protective equipment when using a compass saw.
For the smoothest finish on a curved cut with a compass saw, start by setting the right depth for the saw blade. Next, make sure to follow your marked line as you saw. Keep the saw blade as perpendicular to the surface as possible and avoid changing direction sharply. When you reach the end of the cut, use light pressure and slow, steady strokes to smoothly finish off the cut. With practice, you’ll be able to get the perfect finish on curved cuts.
Using a compass saw for curved cuts is a great way to add a unique design to your woodworking projects. With the right technique, you can easily make smooth, precise cuts with a compass saw. By following the steps outlined in this article, you’ll have no trouble mastering the art of using a compass saw for curved cuts. So grab your compass saw, and get to work! With a little patience and practice, you’ll soon be making beautiful, curved cuts like a pro.